Thursday, March 27, 2008

Quick FAQ: How to use “With…End With” VB statement in C#?

Q: With…End With VB (.NET) also statement is very handy time saver. It makes you able to initialize properties of the object within one statement. Is there equivalent for this “With…End With” statement in C#?

Dim myObj As New MyObj()
With myObj
    .OneProperty = "Hello"
    .AnotherProperty = 2008
    .YetOtherProperty = "World"
End With

A: Yes it is. You should use following syntax to archive the same functionality.

MyObj myObj = new MyObj {
                OneProperty = "Hello",
                AnotherProperty = 2008,
                YetOtherProperty = "World"
            };

By the way. VB.NET (with Linq extension) also has similar syntax

Dim myObj = New MyObj() {
    .OneProperty = "Hello"
    .AnotherProperty = 2008
    .YetOtherProperty = "World" }

In addition, it can be anonymous in both languages

VB.NET
Dim myObj = New With {
    .OneProperty = "Hello"
    .AnotherProperty = 2008
    .YetOtherProperty = "World" }

C#
var myObject = new {
                OneProperty = "Hello",
                AnotherProperty = 2008,
                YetOtherProperty = "World"
            };

Have a nice day.

Tuesday, March 25, 2008

FindResource replacement and how to change control style more then once in Silverlight 2.0 application

As deeper we’re digging in Silverlight 2.0, we finding more and more WPF things and we’re really missing in Silverlight. One of such things is FindResources.

In WPF I had Visual and Logical tree, so I was able to travel the tree to find resource I need. Let’s see an example of the application. We have one resource defined in App level

<Application.Resources>
        <Style TargetType="Button" x:Key="green">
            <Setter Property="Background" Value="Green"/>
        </Style>
</Application.Resources>

Another resources are defined in different levels of Page

<UserControl.Resources>
        <Style TargetType="Button" x:Name="red">
            <Setter Property="Background" Value="Red"/>
        </Style>       
    </UserControl.Resources>
    <Grid x:Name="LayoutRoot" Background="White">
        <Grid.Resources>
            <Style TargetType="Button" x:Name="blue">
                <Setter Property="Background" Value="Blue"/>
            </Style>
        </Grid.Resources>
        <Button Content="Click me" Click="Button_Click">
            <Button.Resources>
                <Style TargetType="Button" x:Name="yellow">
                    <Setter Property="Background" Value="#FFFFFF00"/>
                </Style>
            </Button.Resources>
        </Button>
    </Grid>

Now I want to call FindResource(“red”) and have my style ready for apply. I should not thing a lot about where the resource exists. There is no such method in Silverlight. If so, let’s see what we have. Looking in debugger I can find all my resources as members of the page.

image

But how to get them out? In Silverlight FrameworkElement, we have handy method named FindName. That’s exactly what we need. But how to get Application resources? Simple. Just look into it’s collection. Now, I can write small method, that help me to find resources in any level of Silverlight application.

public static object FindResource(string name)
        {
            if (App.Current.Resources.Contains(name))
            {
                return App.Current.Resources[name];
            }
            else
            {
                FrameworkElement root = App.Current.RootVisual as FrameworkElement;
                return root.FindResource(name);
            }
        }
        internal static object FindResource(this FrameworkElement root, string name)
        {
            if (root != null && root.Resources.Contains(name))
            {
                return root.Resources[name];
            }
            else
            {
                try
                {
                    return root.FindName(name);
                }
                catch { }               
            }

            return null;

Well now we can find all our resources. Let’s apply it to elements

Style s = (Style)Helper.FindResource("red");
b.Style=s;

It works perfect. Let’s take another one

Style s = (Style)Helper.FindResource("blue");
b.Style = s;

image

What is it? “Catastrophic failure (Exception from HRESULT: 0x8000FFFF (E_UNEXPECTED))”. Why this happens only after applying second style? Let’s look into MSDN: “Styles are write-once in Silverlight. You can set a style to override a built-in default style, but attempting to set the same style again will result in an exception.”

What to do? We just have to write our own multi-use styling engine. First of all, we should get all setters of the style

foreach (Setter setter in value.Setters)

Then check target type and set values of setters to appropriate properties.

Type targetType = parent.GetValue(setter.Property).GetType();
parent.SetValue(setter.Property, setter.Value);

Another exception. That’s the mess? All values are strings. I need real values and I have no parsers. Fortunately, we have handy .NET method Convert.ChangeType. Let’s use it. Exception. Let’s check if the type is IConvertible (such as int, double, etc)

if(targetType is IConvertible)
            {
                return Convert.ChangeType(source, targetType, CultureInfo.InvariantCulture);
            }

No exception, but also no result. We need SolidColorBrush and we have only Color name, which is string. How to convert such string into Color instance and then into SolidColorBrush? The answer is reflection. We should write our own FromString converter. First of all let’s capitalize the string

static string Capitalize(this string str)
        {
            if (str.Length > 0)
            {
                return string.Concat(str.Substring(0, 1).ToUpper(), str.Substring(1, str.Length - 1));
            }
            return str;
        }

Then check whether I have static member with the same name in Colors class (not by hand of cause)

MemberInfo[] infos = typeof(Colors).GetMember(color.Capitalize());

If I have, let’s invoke it

if (infos.Length > 0)
            {
                return (Color)typeof(Colors).InvokeMember(color.Capitalize(), BindingFlags.Static | BindingFlags.Public | BindingFlags.GetProperty, null, null, null);
            }

Well done. Now we can use strings which have names of colors and convert them into real color. But what to do with not “well known colors”? Parse it

else if (color.IndexOf('#') == 0)
            {
                return Color.FromArgb(
                    byte.Parse(color.Substring(1, 2), NumberStyles.HexNumber),
                    byte.Parse(color.Substring(3, 2), NumberStyles.HexNumber),
                    byte.Parse(color.Substring(5, 2), NumberStyles.HexNumber),
                    byte.Parse(color.Substring(7, 2), NumberStyles.HexNumber));
            }

We done. Just write another attached method and use in in our converter

internal static Color ParseKnownColor(string color)
        {
            MemberInfo[] infos = typeof(Colors).GetMember(color.Capitalize());
            if (infos.Length > 0)
            {
                return (Color)typeof(Colors).InvokeMember(color.Capitalize(), BindingFlags.Static | BindingFlags.Public | BindingFlags.GetProperty, null, null, null);
            }
            else if (color.IndexOf('#') == 0)
            {
                return Color.FromArgb(
                    byte.Parse(color.Substring(1, 2), NumberStyles.HexNumber),
                    byte.Parse(color.Substring(3, 2), NumberStyles.HexNumber),
                    byte.Parse(color.Substring(5, 2), NumberStyles.HexNumber),
                    byte.Parse(color.Substring(7, 2), NumberStyles.HexNumber));
            }
            return Colors.White;
        }
……

else if(targetType == typeof(SolidColorBrush))
            {
                return new SolidColorBrush(ParseKnownColor(source));
            }

Now you turn to continue with string to object convention for your own need. Starting today you know how to do it.

Here the result

Have a nice day and be good people

Source code for this article>>

Monday, March 24, 2008

Networking and sockets in Silverlight 1.0 (mobile to?)

Well, well, well. Two days ago, we spoke about using sockets within Silverlight 2.0 and WPF. Today, we’ll make a step ahead and will use TCP or UDP client-server connection within Silverlight 1.0. Yes, 1.0 (the one with JavaScript only and no sockets). So, let’s start Rock ‘n Roll.

image

Oh, baby – it cannot be done! Just kidding :) Silverlight 1.0 itself cannot use sockets, however ASP.NET can. We’ll reuse our socket library (from the previous post) and reference it to the ASP.NET page, that hosts our Silverlight 1.0 application.

So, on page load we’ll create our client channel and fully reuse the way we worked within WPF and WinForms. The only difference is that we’ll have three static web methods within our ASP.NET C# code

[System.Web.Services.WebMethod]
    public static string GetHoursAngle()
    {
        return ((msg.Hours * 30) + (12 * msg.Minutes / 60)).ToString();
    }

    [System.Web.Services.WebMethod]
    public static string GetMinutesAngle()
    {
        return (msg.Minutes * 6).ToString();
    }

    [System.Web.Services.WebMethod]
    public static string GetSecondsAngle()
    {
        return (msg.Seconds * 6).ToString();
    }

Those methods can be used (almost) from client side. In order to do it we should register ScriptManager and enable PageMethods on the page

<form id="form1" runat="server">   
<asp:ScriptManager ID="manager" EnablePageMethods="True"  runat="server" />
</form>

Then, create simple Javascript to call to our web methods

<script type="text/javascript">
        function UpdateHoursHand(angle)
        {
            updateClockHand('hTransform',angle);
        }
        function UpdateMinutesHand(angle)
        {
            updateClockHand('mTransform',angle);
        }
        function UpdateSecondsHand(angle)
        {
            updateClockHand('sTransform',angle);
        }
    </script>  

There is no problem to access Silverlight from the hosting webpage, so we’ll add following method to the Silverlight javascript

<script type="text/javascript">
if (!window.Silverlight1Client)
{
    Silverlight1Client = {}
}

Silverlight1Client.Page = function()
{
}
Silverlight1Client.Page.prototype =
{
    handleLoad: function(control, userContext, rootElement)
    {
        this.control = control;
        canvas = rootElement;
    }
}

var canvas;     // the root canvas

function updateClockHand(element, value)
{
  hand = canvas.findName(element);
  hand.Angle = value;
}

if (!window.Silverlight)
{
    Silverlight = {};
}

Silverlight.createDelegate = function(instance, method) {
    return function() {
        return method.apply(instance, arguments);
    }
}

</script>

Now, we have prototype, that can access our Silverlight control, we have web methods, that can bring us information from the server side the only thing we should do is to enable server-side (where we actually receive  update notification) to call client side javascript in order to update layout. And this cannot be done due to the nature of client-server web architecture.

But who told, that we cannot force client side to tickle server side upon the event? We can – not very nice solution, but it works – set timer.

function UpdateClockHands()
        {
           PageMethods.GetHoursAngle(UpdateHoursHand);
            PageMethods.GetMinutesAngle(UpdateMinutesHand);
            PageMethods.GetSecondsAngle(UpdateSecondsHand);
            setTimeout("UpdateClockHands()",1000); 
        }

We add timer recursively to call client side javascript one a second and how it works.

At the end the small diamond for upcoming DEV335: Game Development Using Microsoft’s Latest Technologies

Saturday, March 22, 2008

Networking (raw sockets) in Silverlight and WPF - messaging in general

You, probably, know how to use raw sockets in WinForms. It's pretty the same in WPF, however it is very different (and limited) in Silverlight. Today, we'll create sample application in Silverlight, WPF and WinForm that sending and receiving updates via TCP as well as broadcasting it via UDP (singlecast and multicast). So let's start.

image

First of all we'll create WinForms server, that should distribute updates. It knows what the time is it now and broadcasting the time message via UDP. Also it has TCP server, that distribute updates to all it's clients.

First of all UDP. We should create the working Socket first. It uses all ip addresses to broadcast changes via given port. In order to make the socket to be multicast, we should set appropriate socket options. Let's see the code.

lock (this)
                {
                    if (m_mainSocket == null)
                    {
                        m_mainSocket = new Socket(AddressFamily.InterNetwork,
                            SocketType.Dgram,
                            ProtocolType.Udp);

                        IPEndPoint ipLocal = new IPEndPoint(IPAddress.Any, port);

                        m_mainSocket.SetSocketOption(SocketOptionLevel.Socket, SocketOptionName.ReuseAddress, 1);

                        m_mainSocket.Bind(ipLocal);
                    }
                    IPAddress ip = IPAddress.Parse(castGroupIp);

                    EPCast = new IPEndPoint(ip, port);
                    m_mainSocket.SetSocketOption(SocketOptionLevel.IP, SocketOptionName.AddMembership, new MulticastOption(ip, IPAddress.Any));
                }

Now, the TCP part. It's very similar (for server we do not need specific IP address to bind), however, we should not set multicast options there aside with begin listening right after connection was established.

lock (this)
                {
                    if (m_mainSocket == null)
                    {
                        m_mainSocket = new Socket(AddressFamily.InterNetwork,
                            SocketType.Stream,
                            ProtocolType.Tcp);
                        IPEndPoint ipLocal = new IPEndPoint(IPAddress.Any, port);
                        m_mainSocket.Bind(ipLocal);
                        m_mainSocket.Listen(Backlog);
                        m_mainSocket.BeginAccept(new AsyncCallback(acceptCallback), null);
                    }
                }

In order to send data via UDP. All we have to do is to write it into current socket.

socket.SendTo(data, EPCast);

In TCP world, we should first know who we want to sent to, thus we have to enumerate all incoming clients to save the references to their sockets.

Socket workerSocket = m_mainSocket.EndAccept(asyn);
m_workerSocketList.Add(workerSocket.GetHashCode(), workerSocket);

m_mainSocket.BeginAccept(new AsyncCallback(acceptCallback), null);

Then when we know who to send, all we have to do is to send

socket.Send(data);

Now, when we know how to send, we should learn how to receive network messages. It's exactly the same within TCP or UDP. First check is there is data to receive, then receive it.

if (m_pfnCallBack == null)
                m_pfnCallBack = new AsyncCallback(dataReceivedCallback);
            SocketPacket theSocPkt = new SocketPacket(socket, bufferSize);

            socket.BeginReceive(theSocPkt.dataBuffer, 0,
                theSocPkt.dataBuffer.Length,
                SocketFlags.None,
                m_pfnCallBack,
                theSocPkt);

We done with WinForms and WPF networking. So, we can start with graphics. Since we have no a lot of graphics in WinForms, we'll focus on WPF stuff.

We'll use ContentControl to present the content with datatemplate of our message. We'll create Ellipse for the clock and three rectangles for clock hands. Once data received, we should change RotateTransform value of RenderTransform for each of our rectangles (first set the TransformOrigin to the center of the clock). Bind it together

<Ellipse Width="250" Height="250" StrokeThickness="2" Stroke="Black"/>
                <Rectangle Height="100" Width="20" RadiusX="10" RadiusY="10" Fill="Black" RenderTransformOrigin="0.5,1">
                    <Rectangle.RenderTransform>
                        <TransformGroup>
                            <RotateTransform/>
                            <TranslateTransform Y="25" X="115"/>
                        </TransformGroup>
                    </Rectangle.RenderTransform>
                </Rectangle>
                <Rectangle Height="125" Width="10" RadiusX="5" RadiusY="5" Fill="Black" RenderTransformOrigin="0.5,1">
                    <Rectangle.RenderTransform>
                        <TransformGroup>
                            <RotateTransform/>
                            <TranslateTransform Y="0" X="120"/>
                        </TransformGroup>
                    </Rectangle.RenderTransform>
                </Rectangle>
                <Rectangle Height="125" Width="4"  RadiusX="2" RadiusY="2" Fill="Black" RenderTransformOrigin="0.5,1">
                    <Rectangle.RenderTransform>
                        <TransformGroup>
                            <RotateTransform/>
                            <TranslateTransform Y="0" X="123"/>
                        </TransformGroup>
                    </Rectangle.RenderTransform>
                </Rectangle>

How we should convert values received to the angle to turn the clock hand. We can use only one converter here and bind to the message, according following formula

HourAngle = (Hours * 30)+(12*Minutes/60);
MinuteAngle = Minutes * 6; (it's 360/60)
SecondAngle = Seconds * 6;

Let's run it. Nothing happens. Why? The reason is, that even each property of the object changes, it does not trigger binding, due to the fact, that whole object has not been changed. In order to fix it, we should bind to each property. And in case of hours to Hours and Minutes properties both. But how to make my converter to be single and multi value converter? Simple - all this about interfaces. So, following converter will do the work

public class TimeToAngleConverter : IValueConverter, IMultiValueConverter
    {       

public object Convert(object value, Type targetType, object parameter, System.Globalization.CultureInfo culture)
        {
            return (double)value * 6;
        }

public object Convert(object[] values, Type targetType, object parameter, System.Globalization.CultureInfo culture)
        {
            return ((double)values[0] * 30) + (12 * (double)values[1] / 60);
        }

public object ConvertBack(object value, Type targetType, object parameter, System.Globalization.CultureInfo culture)        { throw new NotImplementedException(); }

public object[] ConvertBack(object value, Type[] targetTypes, object parameter, System.Globalization.CultureInfo culture)        { throw new NotImplementedException(); }

      }

Now binding expressions

<Rectangle Height="100" Width="20" RadiusX="10" RadiusY="10" Fill="Black" RenderTransformOrigin="0.5,1">
                    <Rectangle.RenderTransform>
                        <TransformGroup>
                            <RotateTransform>
                                <RotateTransform.Angle>
                                    <MultiBinding Converter="{StaticResource timeToAngle}">
                                        <Binding Path="Hour"/>
                                        <Binding Path="Minute"/>
                                    </MultiBinding>
                                </RotateTransform.Angle>
                            </RotateTransform>
                            <TranslateTransform Y="25" X="115"/>
                        </TransformGroup>
                    </Rectangle.RenderTransform>
                </Rectangle>
                <Rectangle Height="125" Width="10" RadiusX="5" RadiusY="5" Fill="Black" RenderTransformOrigin="0.5,1">
                    <Rectangle.RenderTransform>
                        <TransformGroup>
                            <RotateTransform Angle="{Binding Path=Minute, Converter={StaticResource timeToAngle}}"/>
                            <TranslateTransform Y="0" X="120"/>
                        </TransformGroup>
                    </Rectangle.RenderTransform>
                </Rectangle>
                <Rectangle Height="125" Width="4"  RadiusX="2" RadiusY="2" Fill="Black" RenderTransformOrigin="0.5,1">
                    <Rectangle.RenderTransform>
                        <TransformGroup>
                            <RotateTransform Angle="{Binding Path=Second, Converter={StaticResource timeToAngle}}"/>
                            <TranslateTransform Y="0" X="123"/>
                        </TransformGroup>
                    </Rectangle.RenderTransform>
                </Rectangle>

We done with graphics in WPF. Let's start it over in Silverlight. We cannot do at least half of what has been done in WPF. MultiBinding is not supported, there is no implicitly templating and Transform class does not support Binding. What to do? Let's remember old good world.

Set the control without using templates, then find resources and save references and set values explicitly (after subscribing to OnPropertyChanged event of cause. Other words, make binding with your own hands.

void onLoaded(object s, RoutedEventArgs e)
        {
            mt = ((RotateTransform)FindName("mTransform"));
            ht = ((RotateTransform)FindName("hTransform"));
            st = ((RotateTransform)FindName("sTransform"));
            ((NetTimeProvider)Resources["timeProvider"]).PropertyChanged += new PropertyChangedEventHandler(Page_PropertyChanged);
        }

        RotateTransform mt, ht, st;

        void Page_PropertyChanged(object sender, PropertyChangedEventArgs e)
        {
            //Binding to Transform does not supported (yet??);
            NetTimeProvider s = sender as NetTimeProvider;
            Dispatcher.BeginInvoke((SendOrPostCallback) delegate (object o)
            {
                NetTimeProvider ntp = o as NetTimeProvider;
                if (e.PropertyName == "Hour")
                {
                    ht.Angle = (ntp.Hour * 30) + (12 * ntp.Minute / 60); ;
                }
                else if (e.PropertyName == "Minute")
                {
                    mt.Angle = ntp.Minute * 6;
                }
                else if (e.PropertyName == "Second")
                {
                    st.Angle = ntp.Second * 6;
                }
            }, s);
        }

Now, when we have layout for our Silverlight control, we should connect to distribution network server. Reuse the manager, used for Winforms and WPF? We can't. Silverlight is subset of .NET framework, and it is not relays on it, so we have to write new network provider for Silverlight. UDP is not supported in Silverlight, thus we'll use TCP networking. Let's see what we have. WebRequest/WebResponse HttpWebRequest/HttpWebResponse - to use it - no. Our server neither HTTP nor Web server. We should use raw sockets in Silverlight. Socket class exists in System.Net dll for Silverlight, however it is very limited. Let's make the connection. First of all, we should know what IP to connect.

Due to security restrictions we cannot do DNS queries in Silverlight. From the other hand we do not want to restrict it to hardcoded name or IP address. In application class of Silverlight we have very handy property, named DnsSafeHost (Application.Current.Host.Source.DnsSafeHost). So let's use it.

What about ports? Can I use TCP socket for any port I want? No. This is another security restriction. The only port range able available for Silverlight is 4502-5432 (only 30 ports). So with those restrictions we'll create the connection as following.

socket = new Socket(AddressFamily.InterNetwork, SocketType.Stream, ProtocolType.Tcp);
            DnsEndPoint ep = new DnsEndPoint(Application.Current.Host.Source.DnsSafeHost, 4502);
            SocketAsyncEventArgs args = new SocketAsyncEventArgs()
            {
                RemoteEndPoint = ep
            };
            args.Completed += onConnected;
            socket.ConnectAsync(args);

Now we should check if the connection is established successfully. The only place we can do it is in onConnected handler. Here also we'll reuse completed event of SocketAsyncArgs to perform read sequence. Upon the end of the handler we'll try to read something from inline socket.

void onConnected(object sender, SocketAsyncEventArgs e)
       {
           if (e.SocketError == SocketError.Success)
           {
               e.Completed -= onConnected;
               e.Completed += onRead;
               Message = "Connected";
           }

           readMoreData(e);
       }

If you remember in regular framework we can wait on socket. We can do it as well in Silverlight.

void readMoreData(SocketAsyncEventArgs e)
{
    e.SetBuffer(buffer, bytesRead, (buffer.Length - bytesRead));
    if (!socket.ReceiveAsync(e))
    {
        onRead(socket, e);
    }
    else
    {
        Message = "Disconnected";
    }

}

So, if everything is ok and we have data in the socket, let's read it. There is some fault proofing should be done in it. First we should check if we go all the message. We know, that the message size is 20 bytes (5 integers - we check first four). Then we should check, that the message we got is our message. So in the header we'll check for Magic number. Then if it's ok we'll parse it and fill all properties of our class.

void onRead(object sender, SocketAsyncEventArgs e)
        {
            if (e.BytesTransferred > 0)
            {
                bytesRead += e.BytesTransferred;
                if (bytesRead == 20 && BitConverter.ToUInt32(buffer, 0) == Magic)
                {
                    Hour = BitConverter.ToInt32(buffer, 4);
                    OnPropertyChanged("Hour");
                    Minute = BitConverter.ToInt32(buffer, 8);
                    OnPropertyChanged("Minute");
                    Second = BitConverter.ToInt32(buffer, 12);
                    OnPropertyChanged("Second");
                    bytesRead = 0;
                }
                readMoreData(e);
            }
        }

If everything fine, we'll return to wait for next message to arrive.

We done. WinForms, WPF and Silverlight speaks over the network one with another, by using TCP and UDP raw sockets. What can be better? When our message is not just clock information, but something related to gaming world (e.g. current position or state of other network players). What am I speaking about? Come to reveal it on my session DEV335: Game Development Using Microsoft’s Latest Technologies in TechEd Israel.

Have a nice day and be good people.

Source code for this article.

Tuesday, March 18, 2008

You can meet me face to face in TechEd

Starting today, if you are attending TechEd '08 Israel, you can set an appointment with me, by using a meeting system in TechEd website. All attendees received an email with username and password to access the system. So enter, click Find and look for WPF, Silverlight or, just תמיר חסון. Then click Request to meet and that's it.

Meet me at TechEd

Note, my free slots will be closed very soon, so, if you want to see and ask me question, hurry to close your time slot.

image

Meet me at Teched '08 Israel >>

Thursday, March 13, 2008

Localization fix for SAP ESA Explorer for Visual Studio

A couple of days ago, new great product [PDF] was released by SAP together with Microsoft. It named SAP Exterprise Services Explorer for Microsoft .NET (you can download sneak preview for free). It still in beta, however there is already major issue - it does not work in localized version of Visual Studio. Neither 2005 nor 2008. Why this happens? The reason is simple. Visual Studio always asks for localized resources for addins and there is no way to work around it.

From one hand, it's bad, that such global company as SAP does not want to localize it's products. From the other hand, there are very few developers, who working with localized versions of development environment. Anyway I started to look into the product to understand what has been done by developers. Oh, my god. They put resources into GAC. How to get them out there?

Actually, GAC is regular windows directory, that exists in %windir%\assembly\GAC\ or %windir%\assembly\GAC_MSIL\. But smart Windows replaces regular Explorer view by customize ActiveX. This does not mean, that you cannot pick files from there. To prove it map GAC folder to another disk. From command line run following command "subst z: %windir%\assembly\GAC_MSIL\". Now you have your GAC mapped to network virtual drive Z

So, if it is regular directory, you can get files from there and put it into any place you want. But why copy it if we can use hard links?

What's the hell are "hard links"? Hard links are symbolic links or symlinks, we know from Unix environment. Yes, you ca ln -fs in Windows :) To do it, you should use file system utility, named fsutil. Actually, those only pointers to real files in your file system. So, "fsutil hardlink create <copy> <original>" will do the work.

Now, when we know where to get those files and how to make symbolic links to them, we should know what versions of Visual Studio we have installed and what are languages of those products. To do this, we have to make a small trip into registry and look into HKLM\SOFTWARE\Microsoft\DevDic\VS\Servicing. There we will find node 8.0 if VS2005 installed and 9.0 if VS2008 installed. Actually, we can pick all necessary information there. Let's see. This key build according following pattern: HKLM\SOFTWARE\Microsoft\DevDiv\[Product Family]\Servicing\[Product Version]\[Product Edition]\[Product Language]. That's exactly what we need. But what are possible values?

  • Product family
    • URT - .NET framework
    • VB - Visual Basic Express
    • VC - Visual C++ Express
    • VCS - Visual C# Express
    • VJS - Visual J# Express
    • VNS - Visual Web Developer Express
    • VS - Visual Studio (all versions)
    • VSTF - Visual Studio Team Foundation Services
  • Product version
    • 8 (or 8.0) - 2005
    • 9.0 - 2008
  • Product Edition
    • VSTD - Standard
    • PRO - Professional
    • VSTS - Team System
  • Product Language
    • Integer of Culture identifier (or other words LCID)

Now, when we know what versions and what languages are installed we should detect where Visual Studio is installed. In this case, we'll need another registry key "HKLM\SOFTWARE\Microsoft\VisualStudio\". Under this node we'll find again 8 or 9 and then value "InstallDir", that, actually, tells us where the current version of Visual Studio is installed.

Last thing to remember, that Visual Studio looks into it's root directory (that we detected in previous step) for directory with two letter ISO language code and resources there.

At this point we know all necessary information in order to work, so we have our program ready. You can, even download and use it :)

image

So, after running and clicking "Apply fix" button (if possible - you have SAP ESA Explorer and localized version(s) of Microsoft Visual Studio), we can start using this great product in any available version of Visual Studio. In English of cause)

image

Have a nice day and do not forget, that not everyone work with English version of development tools.

Download Localization fix for SAP ESA Explorer for Visual Studio 2005 and 2008 (no installation needed - just unzip and run) >>

Running WPF on gas pump (or other Windows CE devices)?

What do you think, is it possible to run WPF on Windows CE enabled devices (e.g. gas pumps, GPS systems, robots, game or automatic teller machines or, even, scientific calculators)? Let's see following code:

StackPanel panel = new StackPanel(Orientation.Horizontal);
            Ellipse ellipse = new Ellipse(10, 10);
            ellipse.Fill = new SolidColorBrush(Colors.Red);
            ellipse.Stroke = new Pen(Color.Black);
            Rectangle rect = new Rectangle();
            rect.Width = 40;
            rect.Height = 40;
            Line l = new Line(20, 20);
            Polygon polygon = new Polygon(new int[] { 0, 0, 20, 0, 20, 20, 0, 20 });
            panel.Children.Add(ellipse);
            panel.Children.Add(rect);
            panel.Children.Add(l);
            panel.Children.Add(polygon);

            panel.AddHandler(Buttons.ButtonUpEvent, (ButtonEventHandler)delegate
            {
                panel.Orientation = panel.Orientation == Orientation.Horizontal ? Orientation.Vertical : Orientation.Horizontal;
            }, false);

Or even this code

void OnButtonHeld(object o)
{
    Button b = (Button)o;
    Dispatcher.Invoke(TimeSpan.FromTicks(10), (ButtonHeldDelegate)delegate(Button btn)
    {
        while (Buttons.IsButtonDown(btn))
        {
            switch (btn)
            {
                case Button.Left: p.X--; break;
                case Button.Up: p.Y--; break;
                case Button.Right: p.X++; break;
                case Button.Down: p.Y++; break;
                case Button.Select: p.X = mainWindow.Width / 2; p.Y = mainWindow.Height / 2; break;
            }
        }

        moveMouse();
    }, b);
}

void moveMouse()
{
    host.DrawRectangle(Colors.Black,2,p.X,p.Y, 100, 100,0,0,Colors.Red,0,0,Colors.Blue,100,100,255);
    host.Flush();
}

This code will run on any Windows CE device. And it is not WPF :) It's .NET Micro Framework. Actually, when we're looking for it's syntax, it looks like WPF/Silverlight and .NET Micro Framework have the same architect. However, it cannot use hardware acceleration and has very limited number of objects. All this because of it's purpose "platform to devices that do not need the fuller functionality available in the .NET Framework and the .NET Compact Framework". I would add Windows Presentation Foundation as well.

The application model of .NET Micro Framework is very similar to WPF. It has native CLR/PAL and HAL and managed libraries.

image

Sufficient number of components in CLR - types, threads and timers, reflection, serialization, GC, networking, other connectivities etc., enables you to create, even games, that will run on even Heart Device.

Other words, cool technology and possible cool appliance for your programming skills. 

How to start? First of all, download .NET Micro Framework v2.5 (VS2005, you can also add Microsoft.SPOT assemblies into your regular VS2008 project) and start programming. It's really simple (I build snake game for less, then hour)

See your applications, running on embedded devices. BTW, I'll probably present something, developed with this framework in my TechEd session aside with WPF, Silverlight and XNA... Keep tuned and have a nice day

Wednesday, March 12, 2008

Deep Zoom composer for download

One of best technologies, presented at Mix'08 was HardRock Memorabilia. It uses technology, previously named Seadragon to adapt image resolution and size to what you're currently viewing. It montages number of images in different resolutions and then dispatches them upon your request. Take a look into Silverlight 2.0 poster, created by Joe Stegman

Now, the million dollar question, how to use it in my application? Simple just download and use it :)

Download Deep Zoom Composer for Silverlight>>

Tuesday, March 11, 2008

My XBAP deployment fails on user account, while administrators can run it well - what to do?

I know only one person, who has following problem, however it makes sense to post all steps to perform in order to solve the problem. Let's start from the error:

While trying to run XBAP application with user's account on my machine, I get following error:

System.UnauthorizedAccessException was unhandled Message="Access is denied. (Exception from HRESULT: 0x80070005 (E_ACCESSDENIED))" Source="System.Deployment

while administrators on the same machine have no problem to run the same XBAPs.

Side note: Similar problems might be while running XPS viewer directly from Internet Explorer.

Declaimer: This posting is provided "AS IS" with no warranties, and confers no rights. Following methods are not an officially supported feature. You can use it strictly for debugging purposes.

Following steps you should take in order to find the root of the problem

  • Check it your users able to get cookies (they should be able to write into isolated storage)
    in order to do it, repair simple HTML page on web server in the same security zone and put following code there

    document.cookie = "testxbapcookie=whatever;expires=12/12/2999 00:00:00";
    var c =
    document.cookie.match ( '(^|;) ?testxbapcookie=([^;]*)(;|$)' );
    if(c)
    document.cookie = "testxbapcookie=whatever;expires=12/12/1999 00:00:00";
    else
    alert("cannot set cookie");


    If you see alert - enable cookie support for this security zone
  • Next step is to check if the user able to write into storage. To do it try to copy and then read some file into "documents and settings\[USERNAME]\Local Settings\Apps\2.0" directory. If you cannot - ask the administrator to give full access to the user to this directory - it's the user's own directory
  • Next step is to check ability of the user to write into some registry key. Try to write something into HKCU\Software\Classes\Software\Microsoft\Windows\CurrentVersion\Deployment\SideBySide\2.0 if you cannot - ask administrator to give right for this node. Alternatively, you can run simple .NET program.

    Guid ri = new Guid("a5c62f6d-5e3e-4cd9-b345-6b281d7a1d1e");
    object o = GetUserStore(0,IntPtr.Zero, ref ri);

    if it failed, enable the access for this node. If you want to me  general, check whether client can read HKCU\Software\Classes before. Also you can check and access to HKCR\Interface\{79EAC9C9-BAF9-11CE-8C82-00AA004BA90B} registry node.
  • If the problem still exists, ask administrator to go to HKLM\SOFTWARE\Microsoft\.NETFramework\Windows Presentation Foundation\Hosting node in registry and create DWORD RunUnrestricted=1 value. This will force PresentationHost to restart itself might solve the problem. Please note, setting RunUnrestricted value might have side effects
  • If you still have a problem - try to delete and recreate the user or reinstall your operation system.

Have a nice day and don't fall with problem - if you do not really need XBAP - do not use it!

Monday, March 10, 2008

Quick Silverlight Tip: Networking in Silverlight 2.0 or my I'm getting HttpStatusCode.NotFound

If you're trying to implement sample XSS networking with Silverlight as it explained in QuickStart guide, but with your own remote host, you'll probably get strange "Not Found" error. You'll check your host, firewall setting, etc and everything looks ok. So what's the problem?

HttpWebRequest req = (HttpWebRequest)HttpWebRequest.Create(new Uri("http://blogs.microsoft.co.il/blogs/tamir"));
           req.BeginGetResponse(getResponse, req);

void getResponse(IAsyncResult ar)
        {
           HttpWebRequest req = (HttpWebRequest)ar.AsyncState;
            HttpWebResponse res = (HttpWebResponse)req.EndGetResponse(ar);
            if (res.StatusCode == HttpStatusCode.OK)


WebClient client = new WebClient(new Uri("http://blogs.microsoft.co.il/blogs/tamir"));
            client.DownloadProgressChanged += new DownloadProgressChangedEventHandler(client_DownloadProgressChanged);
            client.DownloadStringCompleted += new DownloadStringCompletedEventHandler(client_DownloadStringCompleted);
            client.DownloadStringAsync();

void client_DownloadStringCompleted(object sender, DownloadStringCompletedEventArgs e)
       {
           //DONE
       }

       void client_DownloadProgressChanged(object sender, DownloadProgressChangedEventArgs e)
       {
           //Update progress
       }

The reason for it, two small lines in the guide: "Note that the server hosting the feed must opt-in to cross-domain access by providing a Clientaccesspolicy.xml or Crossdomain.xml file at the root of the domain."

Oh, baby, how can I missed it? Create your own Crossdomain.xml now and put it into root directory of your web server. Remember to register XAP MIME type too :)

Have a nice day

Quick Silverlight tip: If you are unable to debug your own control

If you are unable to debug your own control. If nothing happens when you are using in your code the custom control created. If you do not know what's bad you're doing, and there is no error appears. Know, you should put user controls in other assembly and then reference to the assembly of controls in your project and in xaml code. Like this

<UserControl x:Class="MySilverlightProject.Page"
    xmlns="http://schemas.microsoft.com/client/2007"
    xmlns:x="http://schemas.microsoft.com/winfx/2006/xaml"
   xmlns:c="clr-namespace:MySilverlightClassLibrary;assembly=MySilverlightClassLibrary"

In this case your controls will work.

Sunday, March 09, 2008

Quick Silverlight tip: How to make ToolTip works in beta 1

If you paid attention, there is neither ToolTip  nor ToolTipService control in MSDN library, however, you can see it via intellisense in Visual Studio. If you'll try to use it, you'll get AG_E_PARSER_PROPERTY_NOT_FOUND XamlParser exception. The reason is, that ToolTip as well as ToolTip service come from extended controls set. Thus in order to use it, you'll have to make explicit reference to the dll.  So, following will work

<UserControl x:Class="FloraRIA.Page"
    xmlns="http://schemas.microsoft.com/client/2007"
    xmlns:x="http://schemas.microsoft.com/winfx/2006/xaml"
    xmlns:extended="clr-namespace:System.Windows.Controls;assembly=System.Windows.Controls"      

.....

<extended:ToolTipService.ToolTip>
                   <ToolTip Content="Hello world!"/>
</extended:ToolTipService.ToolTip>

Happy coding

Friday, March 07, 2008

Building custom user control in Silverlight 2.0 + how to build code snippet for VS as bonus

Do you remember, that we have "go-live" for Silverlight 2.0 and already have build machines configured? Now it's time to build your very own custom control. Today, we'll build Range Slider.

image

What is range slider? Range slider is a control, that lets you input two values, typically an upper and a lower bound. Normal slider just lets you input one value. So, we have new behavior here, thus we'll have to build our own control without reusing existing one.

But, before we'll start, we'll build code snippet for Visual Studio, that allows us quickly build Dependency Property. Due to fact, that existing snippets (propdp, etc) do not fit Silverlight DP creation pattern. In Silverlight, we have no DependencyPropertyMetadata, so the registration pattern will be

DependencyProperty.Register(
                  "$property$",
                  typeof($type$),
                  typeof($ownerclass$),
                  On$property$PropertyChanged);

Open new XML file, read this and let's start. First of all, general stuff line who am I, what's the short string for the snippet, etc.

<CodeSnippets xmlns="http://schemas.microsoft.com/VisualStudio/2005/CodeSnippet">
  <CodeSnippet Format="1.0.0">
    <Header>
      <SnippetTypes>
        <SnippetType>Expansion</SnippetType>
      </SnippetTypes>
      <Title>Define a DependencyProperty for Silverlight application</Title>
      <Shortcut>propds</Shortcut>
      <Description>
        Code snippet for a property using DependencyProperty as the backing store and a Handler for the DependencyPropertyChanged event
      </Description>
      <Author>Tamir Khason</Author>
    </Header>
    <Snippet>
      <Declarations>
        <Literal Editable="true">
          <ID>type</ID>
          <ToolTip>Property Type</ToolTip>
          <Default>int</Default>
          <Function>
          </Function>
        </Literal>
        <Literal Editable="true">
          <ID>property</ID>
          <ToolTip>Property Name</ToolTip>
          <Default>MyProperty</Default>
          <Function>
          </Function>
        </Literal>
        <Literal Editable="false">
          <ID>ownerclass</ID>
          <ToolTip>
            The owning class of this Property. Typically the class that it is declared in.
          </ToolTip>
          <Default>ClassNamePlaceholder</Default>
          <Function>ClassName()</Function>
        </Literal>
      </Declarations>

Then the interesting stuff. Where my properties and variables.

<Code Language="csharp">
        <![CDATA[
#region $property$

/// <summary>
/// Gets or sets the $property$ possible Value of the $type$ object.
/// </summary>
public $type$ $property$
{
    get { return ($type$)GetValue($property$Property); }
    set { SetValue($property$Property, value); }
}

/// <summary>
/// Identifies the $property$ dependency property.
/// </summary>
public static readonly DependencyProperty $property$Property =
            DependencyProperty.Register(
                  "$property$",
                  typeof($type$),
                  typeof($ownerclass$),
                  On$property$PropertyChanged);

/// <summary>
/// $property$Property property changed handler.
/// </summary>
/// <param name="d">$ownerclass$ that changed its $property$.</param>
/// <param name="e">DependencyPropertyChangedEventArgs.</param>
private static void On$property$PropertyChanged(DependencyObject d, DependencyPropertyChangedEventArgs e)
{
  $ownerclass$ _$ownerclass$ = d as $ownerclass$;
  if (_$ownerclass$!=null)
  {
    //TODO: Handle new value.
  }
}
#endregion $property$
$end$]]>
      </Code>
    </Snippet>
  </CodeSnippet>
</CodeSnippets>

We done, you can either download the ready snippet for Silverlight Dependency Property creation here. All you have to do is to put it into %MY DOCUMENTS%\Visual Studio 2008\Code Snippets\Visual C#\My Code Snippets or \Program Files\Microsoft Visual Studio 9.0\VC#\Snippets\1033\Visual C# directory. Now, we can use "propdps" to quickly define Dependency Property for Silverlight class.

Well done, and now we can start writing. First of all, we'll create base logic class to encapsulate Minimum, Maximum, ValueLow, ValueHigh properties and ValueChange routed events. The only object we can derive from in order to use Dependency Property is Control. So we'll do it.

public abstract class DoubleRangeBase : Control
    {

Building Minimum property...

#region Minimum

        /// <summary>
        /// Gets or sets the Minimum possible Value of the double object.
        /// </summary>
        public double Minimum
        {
            get { return (double)GetValue(MinimumProperty); }
            set { SetValue(MinimumProperty, value); }
        }

        /// <summary>
        /// Identifies the Minimum dependency property.
        /// </summary>
        public static readonly DependencyProperty MinimumProperty =
                    DependencyProperty.Register(
                          "Minimum",
                          typeof(double),
                          typeof(DoubleRangeBase),
                          OnMinimumChanged);

        /// <summary>
        /// MinimumProperty property changed handler.
        /// </summary>
        /// <param name="d">LowHighRangeBase that changed its Minimum.</param>
        /// <param name="e">DependencyPropertyChangedEventArgs.</param>
        private static void OnMinimumChanged(DependencyObject d, DependencyPropertyChangedEventArgs e)
        {
            DoubleRangeBase _LowHighRangeBase = d as DoubleRangeBase;
            if (_LowHighRangeBase != null)
            {
                _LowHighRangeBase._requestedMin = (double)e.NewValue;
                _LowHighRangeBase.CoerceMaximum();
                _LowHighRangeBase.CoerceValues();
                _LowHighRangeBase.OnMinimumChanged((double)e.OldValue, (double)e.NewValue);    
            }
        }
        #endregion

Isn't it nice snippet? :) Now events

public event RoutedPropertyChangedEventHandler<double> ValueLowChanged;
public event RoutedPropertyChangedEventHandler<double> ValueHighChanged;
public event RoutedPropertyChangedEventHandler<ValueChangedEventArgs> ValueChanged;

Handlers... Some virtual and some not

protected virtual void OnMaximumChanged(double oldMaximum, double newMaximum)
        {
        }

protected virtual void OnValueChanged(double oldValue, double newValue, ValueChangeType type)
        {
            RoutedPropertyChangedEventHandler<ValueChangedEventArgs> handler = ValueChanged;
            if (handler != null)
            {
                ValueChangedEventArgs oVal = new ValueChangedEventArgs(oldValue,type);
                ValueChangedEventArgs nVal = new ValueChangedEventArgs(newValue, type);
                handler(this, new RoutedPropertyChangedEventArgs<ValueChangedEventArgs>(oVal, nVal));
            }
        }

Coerces (that we missing in Silverlight, and as for my, this approach much better, then lazy counters, used in extended Silverlight controls)...

private void CoerceValues()
        {
            // Ensure it's a valid value
            if (!IsValidDoubleValue(_requestedValueLow) | !IsValidDoubleValue(_requestedValueHigh) | !IsValidDoubleValue(_requestedMax) | !IsValidDoubleValue(_requestedMin))
            {
                throw new ArgumentException("Invalid double value", MinimumProperty.ToString());
            }

            double minimum = Minimum;
            double maximum = Maximum;
            double valueHigh = ValueHigh;
            double valueLow = ValueLow;

            if (valueHigh < minimum)
            {
                SetValue(ValueHighProperty, minimum);
                return;
            }
            if (valueHigh > maximum)
            {
                SetValue(ValueHighProperty, maximum);
                return;
            }

            if (valueLow < minimum)
            {
                SetValue(ValueLowProperty, minimum);
                return;
            }
            if (valueLow > maximum)
            {
                SetValue(ValueLowProperty, maximum);
                return;
            }

            if (_requestedValueHigh < valueLow)
                _requestedValueHigh = valueLow;

            if (_requestedValueHigh > maximum)
                _requestedValueHigh = maximum;

            if (_requestedValueHigh < minimum)
                _requestedValueHigh = minimum;

            if (_requestedValueHigh != valueHigh)
            {
                SetValue(ValueHighProperty, _requestedValueHigh);
                return;
            }

            if (_requestedValueLow > valueHigh)
                _requestedValueLow = valueHigh;

            if (_requestedValueLow > maximum)
                _requestedValueLow = maximum;

            if (_requestedValueLow < minimum)
                _requestedValueLow = minimum;

            if (_requestedValueLow != valueLow)
            {
                SetValue(ValueLowProperty, _requestedValueLow);
                return;
            }

        }

And we done... Now the turn of the original class. We want to be able to template it, so, let's add first generic.xaml with control template of our range slider. This is pretty simple, but there are some chatchus with it. One, you should explicitly specify the assembly, your control resides in. Another, that implicit styles do not work in Silverlight, so you should specify it. Other stuff is rather similar to WPF (even namespace)

<ResourceDictionary
    xmlns="http://schemas.microsoft.com/winfx/2006/xaml/presentation"
    xmlns:x="http://schemas.microsoft.com/winfx/2006/xaml"
    xmlns:controls="clr-namespace:Sharpsoft.Controls;assembly=Sharpsoft.Controls"
    >

....

<Grid x:Name="HorizontalTemplateElement">
                            <Grid.ColumnDefinitions>
                                <ColumnDefinition Width="Auto" />
                                <ColumnDefinition Width="Auto" />
                                <ColumnDefinition Width="Auto" />
                                <ColumnDefinition Width="Auto" />
                                <ColumnDefinition Width="*" />
                            </Grid.ColumnDefinitions>

                            <!-- Track Layer -->
                            <Rectangle Stroke="Black" StrokeThickness="0.5" Fill="{TemplateBinding BackBrush}" Grid.Column="0" Grid.ColumnSpan="5" Height="3" Margin="5,0,5,0" />

                            <!-- Fillters + Thumb -->
                            <Rectangle x:Name="HorizontalLowFillerElement" Fill="Transparent" Grid.Column="0" Height="3" />
                            <Thumb Style="{TemplateBinding ThumbStyle}" x:Name="HorizontalLowThumbElement" Grid.Column="1"/>
                            <Rectangle x:Name="HorizontalCenterFillerElement" Fill="{TemplateBinding SelectionBrush}" Grid.Column="2" Height="3" />
                            <Thumb Style="{TemplateBinding ThumbStyle}" x:Name="HorizontalHighThumbElement" Grid.Column="3" />
                            <Rectangle x:Name="HorizontalHighFillerElement" Fill="Transparent" Grid.Column="4" Height="3" />
                        </Grid>

We want to be able to change an orientation of the range slider, so adding another section for vertical alignment.

<Grid x:Name="VerticalTemplateElement" Visibility="Collapsed">
                            <Grid.RowDefinitions>
                                <RowDefinition Height="*" />
                                <RowDefinition Height="Auto" />
                                <RowDefinition Height="Auto" />
                                <RowDefinition Height="Auto" />
                                <RowDefinition Height="Auto" />
                            </Grid.RowDefinitions>

                            <!-- Track Layer -->
                            <Rectangle Stroke="Black" StrokeThickness="0.5" Fill="{TemplateBinding BackBrush}" Grid.Row="0" Grid.RowSpan="5" Width="3" Margin="0,5,0,5" />

                            <!-- Fillters + Thumb -->
                            <Rectangle x:Name="VerticalLowFillerElement" Grid.Row="4" Width="3" />
                            <Thumb Style="{TemplateBinding ThumbStyle}" x:Name="VerticalLowThumbElement" Grid.Row="3" />
                            <Rectangle x:Name="VerticalCenterFillerElement" Fill="{TemplateBinding SelectionBrush}" Grid.Row="2" Width="3" />
                            <Thumb Style="{TemplateBinding ThumbStyle}" x:Name="VerticalHighThumbElement" Grid.Row="1" />
                            <Rectangle x:Name="VerticalHighFillerElement" Grid.Row="0" Width="3" />
                        </Grid>

Now, when we done, we can start with the code of the control. Don't forget about TemplatePart attributes....

[TemplatePart(Name = RangeSlider.ElementHorizontalHighFillerName, Type = typeof(Rectangle))]
    [TemplatePart(Name = RangeSlider.ElementHorizontalLowFillerName, Type = typeof(Rectangle))]
    [TemplatePart(Name = RangeSlider.ElementHorizontalCenterFillerName, Type = typeof(Rectangle))]
    [TemplatePart(Name = RangeSlider.ElementVerticalTemplateName, Type = typeof(FrameworkElement))]
    [TemplatePart(Name = RangeSlider.ElementVerticalLowThumbName, Type = typeof(Thumb))]
    [TemplatePart(Name = RangeSlider.ElementVerticalHighThumbName, Type = typeof(Thumb))]
...

public class RangeSlider : DoubleRangeBase
    {

Don't forget to create and register those properties in backend.

/// <summary>
        /// Horizontal low filler
        /// </summary>
        internal virtual Rectangle ElementHorizontalLowFiller { get; set; }
        internal const string ElementHorizontalLowFillerName = "HorizontalLowFillerElement";

        /// <summary>
        /// Vertical template root
        /// </summary>
        internal virtual FrameworkElement ElementVerticalTemplate { get; set; }
        internal const string ElementVerticalTemplateName = "VerticalTemplateElement";

Internally subscribing to mouse and keyboard events in constructor...

public RangeSlider()
        {
            Minimum = 0;
            Maximum = 100;
            ValueHigh = 80;
            ValueLow = 20;

            IsTabStop = true;
            IsEnabled = true;
            Orientation = Orientation.Horizontal;
            GotFocus += delegate { IsFocused = true; };
            LostFocus += delegate { IsFocused = false; };
            KeyDown += delegate(object sender, KeyEventArgs e) { OnKeyPressed(e); };
            MouseEnter += delegate(object sender, MouseEventArgs e) { OnMouseEnter(e); };
            MouseLeave += delegate(object sender, MouseEventArgs e) { OnMouseLeave(e); };
            MouseLeftButtonDown += delegate(object sender, MouseButtonEventArgs e) { OnMouseLeftButtonDown(e); };
            MouseLeftButtonUp += delegate(object sender, MouseButtonEventArgs e) { OnMouseLeftButtonUp(e); };
            SizeChanged += delegate { UpdateTrackLayout(); };
        }

And overriding OnApplyTemplate methods...

protected override void OnApplyTemplate()
       {
           base.OnApplyTemplate();

           ElementRoot = GetTemplateChild(ElementRootName) as FrameworkElement;
           ElementHorizontalTemplate = GetTemplateChild(ElementHorizontalTemplateName) as FrameworkElement;
           ElementHorizontalLowThumb = GetTemplateChild(ElementHorizontalLowThumbName) as Thumb;
           ElementHorizontalHighThumb = GetTemplateChild(ElementHorizontalHighThumbName) as Thumb;
          

Don't forget about Drag events.

if (ElementHorizontalLowThumb != null)
            {
                ElementHorizontalLowThumb.DragStarted += delegate(object sender, DragStartedEventArgs e) { OnLowThumbDragStarted(e); };
                ElementHorizontalLowThumb.DragDelta += delegate(object sender, DragDeltaEventArgs e) { OnLowThumbDragDelta(e); };
            }

Let's add some UI related properties like Orientation, IsFocused, IsEnabled, SelectionBrush, BackBrush, etc... Even ThumbStyle (do you remember, it does not work implicitly)

#region ThumbStyle

        /// <summary>
        /// Gets or sets the ThumbStyle possible Value of the Style object.
        /// </summary>
        public Style ThumbStyle
        {
            get { return (Style)GetValue(ThumbStyleProperty); }
            set { SetValue(ThumbStyleProperty, value); }
        }

        /// <summary>
        /// Identifies the ThumbStyle dependency property.
        /// </summary>
        public static readonly DependencyProperty ThumbStyleProperty =
                    DependencyProperty.Register(
                          "ThumbStyle",
                          typeof(Style),
                          typeof(RangeSlider),
                          null);

        #endregion ThumbStyle

Ah, snippets is cool thing! Now we can override virtual methods to handle it

protected override void OnValueHighChanged(double oldValue, double newValue)
       {
           base.OnValueHighChanged(oldValue, newValue);
           if (ElementRoot != null)
           {
               UpdateTrackLayout();
           }
       }

Mouse events

private void OnMouseEnter(MouseEventArgs e)
        {
            e.Handled = true;
            IsMouseOver = true;
            if ((Orientation == Orientation.Horizontal && ElementHorizontalLowThumb != null && !ElementHorizontalLowThumb.IsDragging && ElementHorizontalHighThumb != null && !ElementHorizontalHighThumb.IsDragging) ||
                (Orientation == Orientation.Vertical && ElementVerticalLowThumb != null && !ElementVerticalLowThumb.IsDragging && ElementVerticalHighThumb != null && !ElementVerticalHighThumb.IsDragging))
            {
                UpdateVisualState();
            }
        }

Stubs for possible animations...

internal void ChangeVisualState(Storyboard state)
        {
            Storyboard previousState = _currentState;
            if (state == previousState)
            {
                return;
            }

            if (state != null)
            {
                if (previousState != null)
                {
                    previousState.Stop();
                }
                _currentState = state;
                state.Begin();
            }
        }

And position calculations at the end

private void OnLowThumbDragDelta(DragEventArgs e)
        {
            double offset = 0;

            if (Orientation == Orientation.Horizontal && ElementHorizontalLowThumb != null)
            {
                offset = e.HorizontalOffset / (ActualWidth - ElementHorizontalLowThumb.ActualWidth) * (Maximum - Minimum);
            }
            else if (Orientation == Orientation.Vertical && ElementVerticalLowThumb != null)
            {
                offset = -e.VerticalOffset / (ActualHeight - ElementVerticalLowThumb.ActualHeight) * (Maximum - Minimum);
            }

            if (!double.IsNaN(offset) && !double.IsInfinity(offset))
            {
                _dragValue += IsDirectionReversed ? -offset : offset;

                double newValue = Math.Min(Maximum, Math.Max(Minimum, _dragValue));

                if (newValue != ValueLow)
                {
                    ValueLow = newValue;
                }               
            }
        }

The only thing we have to do is to treat those measurement and layout calculations

protected virtual void UpdateTrackLayout()
        {
            double maximum = Maximum;
            double minimum = Minimum;
            double valueLow = ValueLow;
            double valueHigh = ValueHigh;

            Grid templateGrid = (Orientation == Orientation.Horizontal) ? (ElementHorizontalTemplate as Grid) : (ElementVerticalTemplate as Grid);
            if (templateGrid != null)
            {
                if (Orientation == Orientation.Horizontal && templateGrid.ColumnDefinitions != null &&
                    templateGrid.ColumnDefinitions.Count == 5)
                {
                    templateGrid.ColumnDefinitions[0].Width = new GridLength(1, IsDirectionReversed ? GridUnitType.Star : GridUnitType.Auto);
                    templateGrid.ColumnDefinitions[4].Width = new GridLength(1, IsDirectionReversed ? GridUnitType.Auto : GridUnitType.Star);                   
                }
                else if (Orientation == Orientation.Vertical && templateGrid.RowDefinitions != null &&
                    templateGrid.RowDefinitions.Count == 5)
                {
                    templateGrid.RowDefinitions[0].Height = new GridLength(1, IsDirectionReversed ? GridUnitType.Auto : GridUnitType.Star);
                    templateGrid.RowDefinitions[4].Height = new GridLength(1, IsDirectionReversed ? GridUnitType.Star : GridUnitType.Auto);                   
                }
            }

            if (Orientation == Orientation.Horizontal && ElementHorizontalCenterFiller != null &&
                ElementHorizontalLowFiller != null && ElementHorizontalLowThumb != null &&               
                ElementHorizontalHighFiller != null && ElementHorizontalHighThumb != null)
            {
                ElementHorizontalLowFiller.Width = (valueLow - minimum) * (ActualWidth - ElementHorizontalHighThumb.ActualWidth - ElementHorizontalLowThumb.ActualWidth) / (maximum - minimum);
                ElementHorizontalCenterFiller.Width = (valueHigh - valueLow) * (ActualWidth - ElementHorizontalHighThumb.ActualWidth - ElementHorizontalLowThumb.ActualWidth) / (maximum - minimum);
                ElementHorizontalHighFiller.Width = (maximum - valueHigh) * (ActualWidth - ElementHorizontalHighThumb.ActualWidth - ElementHorizontalLowThumb.ActualWidth) / (maximum - minimum);

            }
            else if (Orientation == Orientation.Vertical && ElementVerticalCenterFiller != null &&
                ElementVerticalLowFiller != null && ElementVerticalLowThumb != null &&
                ElementVerticalHighFiller != null && ElementVerticalHighThumb != null)
            {
                ElementVerticalLowFiller.Height = (valueLow - minimum) * (ActualHeight - ElementVerticalLowThumb.ActualHeight - ElementVerticalHighThumb.ActualHeight) / (maximum - minimum);
                ElementVerticalCenterFiller.Height = (valueHigh - valueLow) * (ActualHeight - ElementVerticalLowThumb.ActualHeight - ElementVerticalHighThumb.ActualHeight) / (maximum - minimum);
                ElementVerticalHighFiller.Height = (maximum - valueHigh) * (ActualHeight - ElementVerticalLowThumb.ActualHeight - ElementVerticalHighThumb.ActualHeight) / (maximum - minimum);
            }
        }

...and we done.

Now we can do to our Silverlight project and add the control there. something like this will work

<c:RangeSlider
            ValueHigh="{Binding Value1, Mode=TwoWay}"
            ValueLow="{Binding Value2, Mode=TwoWay}"
            Minimum="50"
            Maximum="250"
            SelectionBrush="Red"
            BackBrush="Blue"
            ThumbStyle="{StaticResource thumb}"
            Grid.ColumnSpan="2"
            />

<c:RangeSlider
            ValueHigh="{Binding Value1, Mode=TwoWay}"
            ValueLow="{Binding Value2, Mode=TwoWay}"
            Grid.RowSpan="3"
            Grid.Column="2"
            Orientation="Vertical"
            />

Of cause you need data in backend to bind to. Silverlight does not support ElementName in binding by now. Thus, you should work with object bindings only.

public class MyObject : INotifyPropertyChanged
    {
        double val1, val2;
        public double Value1 { get { return val1; } set { val1 = value; fireChanged("Value1"); } }
        public double Value2 { get { return val2; } set { val2 = value; fireChanged("Value2"); } }

        #region INotifyPropertyChanged Members

        void fireChanged(string prop)
        {
            if (PropertyChanged != null)
                PropertyChanged(this, new PropertyChangedEventArgs(prop));
        }
        public event PropertyChangedEventHandler PropertyChanged;

        #endregion
    }

As exposed thumb style property, so why not to create cool thumb as well?

<UserControl.Resources>
    <l:MyObject x:Name="obj"/>
    <Style TargetType="Thumb" x:Key="thumb">
        <Setter Property="Template">
            <Setter.Value>
                <ControlTemplate TargetType="Thumb">
                    <Path Data="M3,1 L2,2 L1,1 L2,3 z" Stretch="Fill" Fill="Yellow" Stroke="Black"/>
                </ControlTemplate>
            </Setter.Value>
        </Setter>
        <Setter Property="Width" Value="20"/>
        <Setter Property="Height" Value="20"/>
    </Style>
</UserControl.Resources>
<Grid x:Name="LayoutRoot" Background="White" DataContext="{StaticResource obj}">

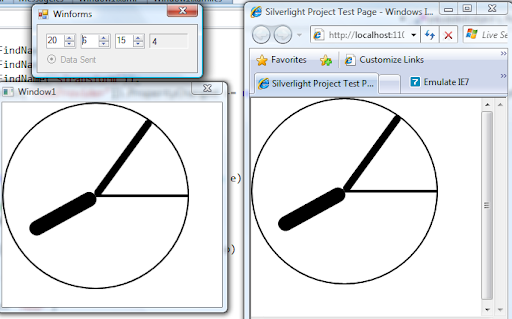
And that it. Now we have out range slider up and working. (You cannot see it from your feed reader. Visit the original page to view)

And the small tip at the end. If you want to register Silverlight MIME extension in your IIS (webhosting, etc), you should use application\x-silverlight-app application type for .xap file extensions.

Have a nice day and be good people.

Source code for this article.