Wednesday, April 30, 2008

It’s broken

Hi, everybody. First of all, I want to apologize for the inconvenience, caused by me to all bloggers in blogs.microsoft.co.il. The reason is, that one of my posts got slashdoted. This night our server, hosted in orcweb received month amount of visitors within couple of hours. This cause some problems, that even load balancing farm was unable to leverage. Currently you can experience problems with rss feeds, the site access and other side effects. To be sure, the right RSS url is “http://feeds.feedburner.com/microsft” Just put in into your rss reader and it will work very soon, right after all technical problems will be solved. Also, my personal web site, that hosts some content in this blog was temporary closed because of extreme traffic excitation, thus neither of Silverlight and SVG examples will work. Sorry again and thank you for understanding.

Tamir

image

Monday, April 28, 2008

Computer languages and facial hair – take two

About four years ago, I wrote an article about relationship between facial hair and computer languages success (this is cached page, the original article has been lost). Today, I want to recall this article and see what happened with my theory.

Let’s start from Fortran, Ada and Simula. Fortran inventor, John Backus, died in Oregon last year. Ada inventor, Jean Ichbiah died three months earlier from brain cancer in Paris. Kristen Nygaard, the father of Simula, died of a heart attack. Let’s pause to remember those giants.

image  image image

What’s about F#? His inventor, Dr. Don Syme has neither beard, nor moustaches. Thus it looks like there is no real future expected to this language

image

What happens with Prolog inventor, Alain Colmerauer? He still has no beard. This means, that the great future is not expected to Prolog as well.

image

Let’s see what’s going on with C? Brian W. Kernighan, Dennis M. Ritchie and Kenneth L. Thompson. They are fine. Still have very good bears, so C has long long life. Currently this computer language is used in 16% of open source projects (according SourceForge)

image image image

Next in row – Smalltalk aka Alan Curtis Kay. He has moustaches today, but no one really using Smalltalk. What’s the problem? He’s Flex concept got small bust those days. But all problems around Flex concept are stopping it from being very popular in real life.

image 

Objective - C – Brad Cox. It does not look like he has at least moustaches those days. Even his Java+ concept faded in past

image

C++ still about 18% of industry, however it seemed like C++ just disappears from from computer horizons. Let’s try to understand why. Just compare Bjarne Stroustrup’s facial hair at the beginning of C++ gold era

 image

A couple of years ago

image

And those days

image

Don’t you see the real degradation of his beard and moustaches? Bjarne, throw your shaver out of window and fast to save C++!

Now let’s see what’s going on with Thomas E. Kurtz, the inventor of Basic. When he has those moustaches BASIC was the language of simple yet not very effective programming

image

However, today this light weigh language losing it’s popularity (less then 2% of the industry). This why:

image

What’s about Perl, that still holding more, than 6% of industry? Larry Wall, keep those grand moustaches!

image

Now my favorite – Ruby and Python. Last year two those languages become super popular in web environment. Has anything changed in their inventors facial hair? Both Van Rossum (Python) and Yukihiro Matsumoto (Python) got beards. BTW, Matz did it because of my article (see comments). Keep doing!

image image

But what’s going on with C# and Java? Anders Hejlsberg still has neither beard, nor moustache, thus it’s after four years, the industry share of C# is around 4%, while James Gosling’s beard got better within 18% of open source projects

image image

What’s next? There are some new languages in horizon. There are no really new, but there are new concepts, like RubyCLR with Sam Ramji, that looks like has small chances to be really popular

image

As well as Scott Guthrie with WPF and Silverlight (well it’s not really him, but other architects in Microsoft are not much hairy)

 image

JSON (aka JSLint) with Douglas Crockford has very good chances. Keep doing, Douglas.

image

When IronPython (and other DLR-based languages) are hard to see see good chances for Jim Hugunin

image

Let’s take a look into functional and modular modern languages such as Haskell. Its arch-fathers Simon Peyton-Jones, Paul Hudak  and Philip Wadler neutralize one each other, so, it’s very hard to predict it’s fortune. However if we’ll normalize their hair we can get very good chances for Haskell.

image  image image

Last time, I completely forgot about PHP by Rasmus Lerdorf. This language is rather popular and it is not because of it’s nature. See Rasmus face to understand why.

image

To summarize, it’s looks like my old assumption is still valid, even for new languages so what are you waiting for? Want to be famous and make significant history? Grow a beard!

Sunday, April 27, 2008

How to make Silverlight be AiR?

Today we’ll speak about three issues

  1. How to make Silverlight application to run as stand alone application and how to insert this application inside your application?
  2. How to escape Silverlight from it’s sand box (how to make it run in full trust mode)
  3. When first two items done, how to make Silverlight to access anyfile in your file system?

Looks scary? Let’s see first reasons for those “hackery” targets. The main reason is to make Silverlight Air (you, probably understand what I’m speaking about :)). Why? When I want to build Silverlight Image Upload control. The one similar to those Yahoo, Facebook and many others have. With live preview, editing (before uploading), drag and drop, etc. Yes, I do not want ugly File Open dialog from Silverlight. I want it sexy, yet functional! To do this, we have to make Silverlight be able to access filesystem. Of cause I want to ask user to authorize me first, then I can get an access.

image

The other reason is to incorporate Silverlight control inside WinForms application. Why? There are some reasons - “light weigh stuff”, maybe :). Maybe banner ads inside desktop application. It’s just cool :). Well, there are some other more serious reasons. So let’s start.

First task – to make it run as stand alone application.

Well, this one is easy. All you have to do is to have WebBrowser control with Silverlight content inside it in your application. So,

WebBrowser wb = new WebBrowser();
wb.Parent = panel1;
wb.Dock = DockStyle.Fill;
wb.Url = new Uri("http://0x15.net/play/SLFindResource/SLFindResource.html");

We done. But we’re in desktop, thus I want it full trust… This is most interesting part of today’s post.

Second task – to make it run in User Full Trust mode.

First try – to incorporate Silverlight’s OCX (ActiveX) control. Add npctrl.dll from [Program Files]\Microsoft Silverlight\[Version] – this is ActiveX and Visual Studio will create wrapper with AxHost. This one is cool, but it wont work. why? As you, probably, know Silverlight connected to it’s web page host DOM when we’re using it as stand alone player it cannot find it’s document, thus initialization failed. So what to do? What can provide me DOM from one side and run in full trust from the other side. Someone remember what HTA is (it is not mobile device, it’s very beginning of RIA era). HTML applications were run by very special host, named mshta.exe it’s in [Windows]\System32 folder and it’s still there. Everything running inside MSHTA will run by default in full trust mode. From one hand it’s regular IE, (do we have DOM), from other hand it’s make us able to run full trust internet application. Let’s use it (from code)

ProcessStartInfo mshta = new ProcessStartInfo("mshta", "http://0x15.net/play/SLFindResource/SLFindResource.html");
Process p = Process.Start(mshta);

Now we have strange window, running our Silverlight application. What’s next? Incorporate it inside our application. What’s the problem p (my process).MainWindowHandle and then SetParent for to the control I want. Well, it does not work. MSHTA has no (publicly) main window. So, we’ll find it and then change it’s parent. His class named “HTML Application Host Window Class”.

LockWindowUpdate(GetDesktopWindow());
ProcessStartInfo mshta = new ProcessStartInfo("mshta", "http://0x15.net/play/SLFindResource/SLFindResource.html");
Process p = Process.Start(mshta);
p.WaitForInputIdle();
ptr = FindWindow("HTML Application Host Window Class", null);

SetParent(ptr, panel1.Handle);
SendMessage(ptr, WM_SYSCOMMAND, SC_MAXIMIZE, 0);

LockWindowUpdate(IntPtr.Zero);

Yu-hoo. We hosted Silverlight page inside our application. It’s full trust so, we can access file system. But wait… Silverlight is not designed to have an access to the file system. The only space it can see is isolated storage, thus it has no classes for listing files anywhere. what to do?

Third task – to make it access user’s file system

We need another ActiveX to run from Javascript (or C# code) that knows to access to file system. Our hosting document can initialize it and then expose relevant methods to Silverlight. What’s such class? Let’s back to gold era of unsafe computing – we have Scripting.FileSystemObject there. This class is very dangerous it can do anything in local file system. Many system administrators using this class to script their evil login scripts (those black quick command line promps, that doing something bad to your system each time you’re logging in in your domain). It know everything about your disks and can be run from full trust environment. So, it’s just exactly what we need. Get all drives in your machine

drivetypes = [ 'Unknown', 'Removable', 'Fixed', 'Network', 'CD-ROM', 'RAM Disk' ],
driveprops = [ 'DriveLetter', 'DriveType', 'ShareName', 'IsReady', 'Path', 'RootFolder', 'FileSystem', 'SerialNumber', 'VolumeName', 'TotalSize', 'AvailableSpace', 'FreeSpace' ];

function getdrives() {
var fso = new ActiveXObject( 'Scripting.FileSystemObject' ),
  e = new Enumerator(fso.Drives),
  add = function(i) {
   i = driveprops[i];
   var prop = f[i];
   if( ( prop || prop===0 || prop===false ) && ( i!=='AvailableSpace' || prop!==free ) ) {
    if( /(Type)$/.test( i ) ) { prop = drivetypes[ prop ]; }
    if( /(Size|Space)$/.test( i ) ) { prop = bykb( prop, true ); }
    s.push( i.toCamelCase() + ':\t' + ( i.length < 8 ? '\t' : '' ) + prop );
   }
  },

Then folders

function getfolder( s ) { s = trim( s ) || 'C:';
var fso = new ActiveXObject( 'Scripting.FileSystemObject' ),
  e, f, i, r = [];
if( fso.FolderExists( s ) ) {
  f = fso.GetFolder( s );
  e = new Enumerator(f.SubFolders);
  for( ; !e.atEnd(); e.moveNext() ) {
   if( ( i = e.item() ) ) { r.push( ' ' + i ); }
  }
  e = new Enumerator(f.files);
  for( ; !e.atEnd(); e.moveNext() ) {
   if( ( i = e.item() ) ) { r.push( '' + i ); }
  }
}
return r;
}

And files at the end

function getfile( form ) {
var fso = new ActiveXObject( 'Scripting.FileSystemObject' ),
  forReading = 1, forWriting = 2, forAppending = 8,
  dd = function( o, s ) {
   try {
    s = f[s] + '';
    o.value = s.replace( /^(\w{3}) (\w+) (\d\d?) ([\d:]+) ([\w+]+) (\d+)$/, '$3 $2 $6 $4' );
   } catch(e) {
    o.value = e.message;
   }
  },

Very cool we have files by using f = fso.GetFile( name ); method, now we can do anything with it. For example get or set attributes f.attributes, or rename f.Name = s, or, even delete it f.Delete(); Isn’t it really evil?

We done. Now you can run Silverlight as full trust desktop application and, even host it wherever you want. Even inside calculator…

ProcessStartInfo calc = new ProcessStartInfo("calc");
using (Process p = Process.Start(calc))
{
    p.WaitForInputIdle();
    SetParent(ptr, p.MainWindowHandle);
    SendMessage(ptr, WM_SYSCOMMAND, SC_MAXIMIZE, 0);
    p.WaitForExit();
}

Happy programming and be good people.

SilverForms.zip [53.7 Kb]

Wednesday, April 23, 2008

Webcam control with WPF or how to create high framerate player with DirectShow by using InteropBitmap in WPF application

Did you ever see, that MediaElement “eats” about 30% of CPU while playing movie in WPF? Did you thought, that you  can display live camera capture in WPF with 60 fps full screen (I have really high resolution 1920x1200) and 2% of  CPU? You did not? Let’s see how it can be done. Today we’ll create simple WebCam player control that can show you live video capturing with high frame rate. In order to do it, we’ll use DirectShow, WPF and make them work together.

  image

You, probably do not believe me. Let’s start. In order to build this application, we need to make DirectDraw working in C# managed code. We can use DirectShow.NET, but this time we’ll do it manually. Why? because I love to do things manually. So let’s understand what we need? Actually, not very much: one Sample Grabber (ISampleGrabber) and one Device input filter(IBaseFilter). Both we should connvert with Graph Builder (IGraphBuilder) and point to some grabber implementation (ISampleGrabberCB). Also, we do not want DirectShow to render video for use, thus we’ll send it’s default Video Window (IVideoWindow) to null with no AutoShow and then run the controller (IMediaControl). Do you tired enough to lost me? Let’s see the code. One Filter graph with one Device Filter and one Sample grabber.

graph = Activator.CreateInstance(Type.GetTypeFromCLSID(FilterGraph)) as IGraphBuilder;
sourceObject = FilterInfo.CreateFilter(deviceMoniker);

grabber = Activator.CreateInstance(Type.GetTypeFromCLSID(SampleGrabber)) as ISampleGrabber;
grabberObject = grabber as IBaseFilter;

graph.AddFilter(sourceObject, "source");
graph.AddFilter(grabberObject, "grabber");

Set media type for our grabber

using (AMMediaType mediaType = new AMMediaType())
                {
                    mediaType.MajorType = MediaTypes.Video;
                    mediaType.SubType = MediaSubTypes.RGB32;
                    grabber.SetMediaType(mediaType);

And then connect device filter to out pin and grabber to in pin. Then get capabilities of video received (thiss stuff come from your web camera manufacturer)

if (graph.Connect(sourceObject.GetPin(PinDirection.Output, 0), grabberObject.GetPin(PinDirection.Input, 0)) >= 0)
                    {
                        if (grabber.GetConnectedMediaType(mediaType) == 0)
                        {
                            VideoInfoHeader header = (VideoInfoHeader)Marshal.PtrToStructure(mediaType.FormatPtr, typeof(VideoInfoHeader));
                            capGrabber.Width = header.BmiHeader.Width;
                            capGrabber.Height = header.BmiHeader.Height;
                        }
                    }

Out pin to grabber without buffering and callback to grabber object (this one will get all images from our source).

graph.Render(grabberObject.GetPin(PinDirection.Output, 0));
grabber.SetBufferSamples(false);
grabber.SetOneShot(false);
grabber.SetCallback(capGrabber, 1);

Dump output window

IVideoWindow wnd = (IVideoWindow)graph;
wnd.put_AutoShow(false);
wnd = null;

And run the controller

control = (IMediaControl)graph;
control.Run();

We done. Now our video is captured and can be accessed from BufferCB method of ISampleGrabberCB. Next step is to do WPF related stuff

First of all, we’ll use InteropBitmap. This one will provide us with real performance bust. So, one our DirectShow graph is ready and we know result image capabilities, we can create memory section and map it in order to provide ISampleGrabberCB with place to put images. This will be always the same pointer, so all we have to do is to .Invalidate interop image.

if (capGrabber.Width != default(int) && capGrabber.Height != default(int))
                {

                    uint pcount = (uint)(capGrabber.Width * capGrabber.Height * PixelFormats.Bgr32.BitsPerPixel / 8);
                    section = CreateFileMapping(new IntPtr(-1), IntPtr.Zero, 0x04, 0, pcount, null);
                    map = MapViewOfFile(section, 0xF001F, 0, 0, pcount);
                    BitmapSource = System.Windows.Interop.Imaging.CreateBitmapSourceFromMemorySection(section, capGrabber.Width, capGrabber.Height, PixelFormats.Bgr32,
                        capGrabber.Width * PixelFormats.Bgr32.BitsPerPixel / 8, 0) as InteropBitmap;
                    capGrabber.Map = map;
                    if (OnNewBitmapReady != null)
                        OnNewBitmapReady(this, null);
                }

Now in capGrabber (ISampleGrabberCB) we’ll copy buffer, comes from our webcam to the mapped location for WPF usage

public int BufferCB(double sampleTime, IntPtr buffer, int bufferLen)
        {
            if (Map != IntPtr.Zero)
            {
                CopyMemory(Map, buffer, bufferLen);
                OnNewFrameArrived();
            }
            return 0;
        }

All we have to do is to call InteropBitmap.Invalidate() each frame to reread the image bytes from the mapped section.

if (BitmapSource != null)
                    {
                        BitmapSource.Invalidate();

How do display all this stuff? Simple – subclass from Image and set it’s Source property with the interop bitmap.

public class CapPlayer : Image,IDisposable
    {

void _device_OnNewBitmapReady(object sender, EventArgs e)
        {
            this.Source = _device.BitmapSource;
        }

Now, the usage from XAML is really simple

<l:CapPlayer x:Name="player"/>

We done :) As always, download full source code for this article

…and be good people and don’t tell anymore, that WPF performance in terms of imaging is sucks :)

P.S. small ‘r’ if you have more, then one WebCam connected. Inside CapDevice class there is member, public static FilterInfo[] DeviceMonikes, that provides you with all DirectShow devices installed. So, the only thing you should do in order to change the device is to set deviceMoniker = DeviceMonikes[0].MonikerString; with the moniker of your device. This sample works with first one.

Tuesday, April 22, 2008

Quick WPF Tip: How to bind to WPF application resources and settings?

You, probable know, that you can save application resources and settings within handy classes Settings and Properties, provided by Visual Studio code generator. Just put your values, set the usage scope and all you have to do is to save it upon request.

image

This feature is really useful and great time saver. But how to use it from WPF? Visual Studio do not know to create Dependency Objects for setting and resource… Following the sample of how designer saves setting information

[global::System.Runtime.CompilerServices.CompilerGeneratedAttribute()]
   [global::System.CodeDom.Compiler.GeneratedCodeAttribute("Microsoft.VisualStudio.Editors.SettingsDesigner.SettingsSingleFileGenerator", "9.0.0.0")]
   internal sealed partial class Settings : global::System.Configuration.ApplicationSettingsBase {
       private static Settings defaultInstance = ((Settings)(global::System.Configuration.ApplicationSettingsBase.Synchronized(new Settings())));
       public static Settings Default {
           get {
               return defaultInstance;
           }
       }
       [global::System.Configuration.UserScopedSettingAttribute()]
       [global::System.Diagnostics.DebuggerNonUserCodeAttribute()]
       [global::System.Configuration.DefaultSettingValueAttribute("0")]
       public double Left {
           get {
               return ((double)(this["Left"]));
           }
           set {
               this["Left"] = value;
           }
       }

As you can see it creates singleton and publish relevant properties through it, thus you can access the information by using following syntax

UserSettings.Properties.Settings.Default.Left = 10;

But how to create binding for such structure? Simple – this is regular static class. As well as DateTime.Now and so. Also we are not interested to know, whenever this property updated. This means, that following code will do all necessary work.

<Window x:Class="UserSettings.Window1"
    xmlns="http://schemas.microsoft.com/winfx/2006/xaml/presentation"
    xmlns:x="http://schemas.microsoft.com/winfx/2006/xaml"
    xmlns:p="clr-namespace:UserSettings.Properties"
    WindowStartupLocation="Manual"
    Title="Window1"
    Height="{Binding Source={x:Static p:Settings.Default}, Path=Height, Mode=TwoWay}"
    Width="{Binding Source={x:Static p:Settings.Default}, Path=Width, Mode=TwoWay}"
    Left="{Binding Source={x:Static p:Settings.Default}, Path=Left, Mode=TwoWay}"
    Top="{Binding Source={x:Static p:Settings.Default}, Path=Top, Mode=TwoWay}"

As you see, we just point by using x:Static provider of type UserSettings.Properties.Settings.Default and requesting it’s members. Now all you have to do is to save updated information upon the application exit.

protected override void OnClosing(System.ComponentModel.CancelEventArgs e)
        {
            Settings.Default.Save();
            base.OnClosing(e);
        }

We done. Starting now, user can move and resize WPF window and all information will be saved in Settings class automatically. Next time this user will open the application it will restore it state (position and size) automatically.

Happy coding.

WordML to FlowDocument – how to convert docx files to WPF FlowDocument

Recently we spoke about converting XPS files and FixedDocuments to FlowDocuments. It works, but there are lot of problems, due to fact, that FixedDocument (or XPS/PDF document) has less information, then the original file. Those files are, actually, printout of the original document. Also we know how to use Windows Vista Preview Handler to view original MS Office files inside WPF application. So why not to work with the originals? Why not to convert Microsoft Office document into FlowDocument and then view it as XAML files inside native FlowDocumentReader? Can we do this? Sure we can. Let’s see how…

image

First of all, we should understand what is WordML (docx) document and what are differences between old Word format (doc) and new (docx).

WordML (ExcelML, etc) is new open format by Microsoft. It’s very similar to XPS – package with bunch of XML files inside it. We can work with those files directly from WPF code, by using System.IO.Packaging namespace as well as we can download and use technology preview of Open XML Format SDK with new handy classes, used to read and write Open XML document.

Let’s start coding. first of all we should read the file. We can do it either by using Package or WordprocessingDocument class

using (WordprocessingDocument wdoc = WordprocessingDocument.Open(path, false))
            {

Now, let’s read the main part (Word/document.xml) file and load it into XDocument. Yes, we’ll use XLinq to do all work. Why? ‘Cos it’s Passover now, I’m tired of Matzo and want spaghetti :) Also it’s because of Eric White, who looked for new job inside Microsoft to run away of such code, but he’s the only men, who really understand what’s happened inside those evil lines, so he stayed in his position.

using (StreamReader sr = new StreamReader(wdoc.MainDocumentPart.GetStream()))
                {
                    xdoc = XDocument.Load(sr);

Next step is to read all paragraphs inside the main document. See? Paragraphs… We have Paragraphs also in FlowDocument. All we have to do is to convert

var paragraphs = from par in xdoc
                                         .Root
                                         .Element(w_body)
                                         .Descendants(w_p)
                                     let par_style = par
                                         .Elements(w_pPr)
                                         .Elements(w_pStyle)
                                         .FirstOrDefault()
                                     let par_inline = par
                                         .Elements(w_pPr)
                                         .FirstOrDefault()
                                     let par_list = par
                                         .Elements(w_pPr)
                                         .Elements(w_numPr)
                                         .FirstOrDefault()                                    
                                     select new
                                     {
                                         pElement = par,
                                         pStyle = par_style != null ? par_style.Attribute(w_val).Value : (from d_style in xstyle
                                                                                                               .Root
                                                                                                               .Elements(w_style)
                                                                                                          where
                                                                                                              d_style.Attribute(w_type).Value == "paragraph" &&
                                                                                                              d_style.Attribute(w_default).Value == "1"
                                                                                                          select d_style).First().Attribute(w_styleId).Value,
                                         pAttrs = par_inline,
                                         pRuns = par.Elements().Where(e => e.Name == w_r || e.Name == w_ins || e.Name == w_link || e.Name == w_numId || e.Name == w_numPr || e.Name == w_ilvl),
                                         pList = par_list
                                     };

Remember spaghetti? Here are macaroni XLinq code. Next for each WordML paragraph we’ll FlowDocument paragraph and read WordML runs (run? we have Run class in FlowDocument)

foreach (var par in paragraphs)
                    {
                        Paragraph p = new Paragraph();

var runs = from run in par.pRuns
                                   let run_style = run
                                       .Elements(w_rPr)
                                       .FirstOrDefault()
                                   let run_istyle = run
                                       .Elements(w_rPr)
                                       .Elements(w_rStyle)
                                       .FirstOrDefault()
                                   let run_graph = run
                                       .Elements(w_drawing)
                                   select new
                                   {
                                       pRun = run,
                                       pRunType = run.Name.LocalName,
                                       pStyle = run_istyle != null ? run_istyle.Attribute(w_val).Value : string.Empty,
                                       pAttrs = run_style,
                                       pText = run.Descendants(w_t),
                                       pBB = run.Elements(w_br) != null,
                                       pExRelID = run.Name == w_link ? run.Attribute(rels_id).Value : string.Empty,
                                       pGraphics = run_graph
                                   };

                        foreach (var run in runs)
                        {

But what to do with Styles? Simple, let’s read it from the original document. In order to do it, we have to get StyleDefinitionsPart of our document and convert OpenXML styles into WPF styles

XDocument xstyle, xdoc;
                using (StreamReader sr = new StreamReader(wdoc.MainDocumentPart.StyleDefinitionsPart.GetStream()))
                {
                    xstyle = XDocument.Load(sr);
                    var styles = from style in xstyle
                                     .Root
                                     .Descendants(w_style)
                                 let pPr = style
                                     .Elements(w_pPr)
                                     .FirstOrDefault()
                                 let rPr = style
                                     .Elements(w_rPr)
                                     .FirstOrDefault()
                                 select new
                                 {
                                     pStyleName = style.Attribute(w_styleId).Value,
                                     pName = style.Element(w_name).Attribute(w_val).Value,
                                     pPStyle = pPr,
                                     pRStyle = rPr
                                 };

                    foreach (var style in styles)
                    {
                        Style pStyle = style.pPStyle.ToWPFStyle();
                        pStyle.BasedOn = style.pRStyle.ToWPFStyle();

                        doc.Resources.Add(style.pStyleName, pStyle);
                    }
                }

And what’s happens inside ToWPFStyle attached method? It’s just enumerates styles, by extracting well known tags and create appropriate setter for those properties.

internal static Style ToWPFStyle(this XElement elem)
        {
            Style style = new Style();
            if (elem != null)
            {
                var setters = elem.Descendants().Select(elm =>
                    {
                        Setter setter = null;
                        if (elm.Name == w + "left" || elm.Name == w + "right" || elm.Name == w + "top" || elm.Name == w + "bottom")
                        {
                            ThicknessConverter tk = new ThicknessConverter();
                            Thickness thinkness = (Thickness)tk.ConvertFrom(elm.Attribute(w+"sz").Value);

                            BrushConverter bc = new BrushConverter();
                            Brush color = (Brush)bc.ConvertFrom(string.Format("#{0}",elm.Attribute(w+"color").Value));

                            setter = new Setter(Block.BorderThicknessProperty,thinkness);
                            //style.Setters.Add(new Setter(Block.BorderBrushProperty,color));
                        }                       
                        else if (elm.Name == w + "rFonts")
                        {
                            FontFamilyConverter ffc = new FontFamilyConverter();
                            setter = new Setter(TextElement.FontFamilyProperty,ffc.ConvertFrom(elm.Attribute(w+"ascii").Value));
                        }
                        else if (elm.Name == w + "b")
                        {
                            setter = new Setter(TextElement.FontWeightProperty, FontWeights.Bold);
                        }
                        else if (elm.Name == w + "color")
                        {
                            BrushConverter bc = new BrushConverter();
                            setter = new Setter(TextElement.ForegroundProperty, bc.ConvertFrom(string.Format("#{0}",elm.Attribute(w_val).Value)));
                        }                       

Now, when we have Paragraphs, Runs and Styles we can do the similar transformations for Images, Hyperlinks, Graphics, Tables, Lists. For almost all elements, used in WordML we have sibling WPF class. Let’s create attached method for FlowDocument and we done

FlowDocument fd = new FlowDocument();
            fd.LoadFromWordML("../../testdoc.docx");
            reader.Document = fd;

Pretty easy isn’t it? So what are you waiting for? Convert the rest in order to be able to display Word (and other Office 2007 and later) document inside FlowDocumentReader or any other FlowDocument viewer inside your WPF document. It’s also very easy to build Office addin, that makes you able to save document as XAML FlowDocument and read them inside WPF application later.

This is the best way to use Microsoft Office document in .NET framework 3.0 and 3.5 application. Download sample source code for this article to see whole class (this is not final product – you have a lot of work to do in order to make it 100% complaint to WordML specification.

Have a nice day and be good people.

Friday, April 18, 2008

Using Vista Preview Handlers in WPF application

First of all what is Preview Handler? Preview Handler is COM object, that called when you want to display the preview of your item. Other words, Preview Handlers are lightweight, rich and read-only previews of file’s content in a reading pane. You can find preview handlers in Microsoft Outlook 2007, Windows Vista and, even sometimes in XP. Can we use preview handlers within your WPF application? Probably we can. Let’s see how we can do it.

 image

Let’s create simple WPF window, that displays file list from left and preview of items in right side. We’ll use simple file list string collection as our datasource, bind it to Listbox Items and then bind selected item to some contentpresenter. I blogged about this approach earlier.

<Grid DataContext={StaticResource files}>
        <Grid.ColumnDefinitions>
            <ColumnDefinition Width=".2*"/>
            <ColumnDefinition Width=".8*"/>
        </Grid.ColumnDefinitions>
        <ListBox ItemsSource={Binding} IsSynchronizedWithCurrentItem="True" />
        <ContentPresenter Grid.Column=”1” Content={Binding Path=/}/>
        <GridSplitter Width="5"/>
    </Grid>

Our data source should be updated automatically within changes of file system. So, this is very good chance to use FileSystemWatcher object.

class ListManager:ThreadSafeObservableCollection<string>
    {
        string dir = Environment.GetFolderPath(Environment.SpecialFolder.MyDocuments);
        public ListManager()
        {
            FileSystemWatcher fsw = new FileSystemWatcher(dir);
            fsw.NotifyFilter = NotifyFilters.FileName | NotifyFilters.Size | NotifyFilters.LastWrite;
            fsw.Created += new FileSystemEventHandler(fsw_Created);
            fsw.Deleted += new FileSystemEventHandler(fsw_Deleted);

            fsw.EnableRaisingEvents = true;

            string[] files = Directory.GetFiles(dir);
            for (int i = 0; i < files.Length; i++)
            {
                base.Add(files[i]);
            }

        }

        void fsw_Deleted(object sender, FileSystemEventArgs e)
        {
            base.Remove(e.FullPath);
        }

        void fsw_Created(object sender, FileSystemEventArgs e)
        {
            base.Add(e.FullPath);
        }
    }

Now, after applying simple DataTemplate, we can see file list in the left pane of our application. It will be updated automatically upon files change in certain directory.

Next step is to understand how to use Preview Handlers within custom application. After all, preview handler is regular COM object, that implements following interfaces

[ComImport]
[InterfaceType(ComInterfaceType.InterfaceIsIUnknown)]
[Guid("8895b1c6-b41f-4c1c-a562-0d564250836f")]
interface IPreviewHandler
{
    void SetWindow(IntPtr hwnd, ref RECT rect);
    void SetRect(ref RECT rect);
    void DoPreview();
    void Unload();
    void SetFocus();
    void QueryFocus(out IntPtr phwnd);
    [PreserveSig]
    uint TranslateAccelerator(ref MSG pmsg);
}

[ComImport]
[InterfaceType(ComInterfaceType.InterfaceIsIUnknown)]
[Guid("b7d14566-0509-4cce-a71f-0a554233bd9b")]
interface IInitializeWithFile
{
    void Initialize([MarshalAs(UnmanagedType.LPWStr)] string pszFilePath, uint grfMode);
}

[ComImport]
[InterfaceType(ComInterfaceType.InterfaceIsIUnknown)]
[Guid("b824b49d-22ac-4161-ac8a-9916e8fa3f7f")]
interface IInitializeWithStream
{
    void Initialize(IStream pstream, uint grfMode);
}

In order to find and attach preview handler to specific file type, all we have to do is to look into HKEY_CLASSES_ROOT and find COM Guid of preview handler (8895b1c6-b41f-4c1c-a562-0d564250836f). The default value of this key will be the Guid of COM object, that actually can preview this type of files. Let’s do it

string CLSID = "8895b1c6-b41f-4c1c-a562-0d564250836f";
            Guid g = new Guid(CLSID);
            string[] exts = fileName.Split('.');
            string ext = exts[exts.Length - 1];
            using (RegistryKey hk = Registry.ClassesRoot.OpenSubKey(string.Format(@".{0}\ShellEx\{1:B}", ext, g)))
            {
                if (hk != null)
                {
                    g = new Guid(hk.GetValue("").ToString());

Now, we know, that this file can be previewed, thus let’s initialize appropriate COM instance for preview handler

Type a = Type.GetTypeFromCLSID(g, true);
object o = Activator.CreateInstance(a);

There are two kinds of initializations for preview handlers – file and stream based. Each one has it’s own interface. So, we can only check if the object created implements this interface to be able to initialize the handler

IInitializeWithFile fileInit = o as IInitializeWithFile;
IInitializeWithStream streamInit = o as IInitializeWithStream;

bool isInitialized = false;
if (fileInit != null)
{
   fileInit.Initialize(fileName, 0);
   isInitialized = true;
  }
else if (streamInit != null)
  {
    COMStream stream = new COMStream(File.Open(fileName, FileMode.Open));
     streamInit.Initialize((IStream)streamInit, 0);
     isInitialized = true;
  }

After we initialized the handler we can set handle to the window we want the handler to sit in. Also we should provide bounds of region of the window to handler be placed in.

if (isInitialized)
                    {
                        pHandler = o as IPreviewHandler;
                        if (pHandler != null)
                        {
                            RECT r = new RECT(viewRect);
                            pHandler.SetWindow(handler, ref r);
                            pHandler.SetRect(ref r);

                            pHandler.DoPreview();
                        }
                    }

So far so good, but we’re in WPF. Thus ContentPresenter we’re using has no handle! That’s right, but the main WPF application window has. So, let’s first get the main application window handle, then create rectangle bounds of the region, occupied by ContentControl.

In order to do it, we’ll derive from ContentPresenter and will listen to ActualtHeight and ActualeWidth property of it. First get the window handler (it wont be changed during the application life cycle), then update layout of our WPF Preview Handler for region and bounds of the control.

class WPFPreviewHandler : ContentPresenter
    {
        IntPtr mainWindowHandle = IntPtr.Zero;
        Rect actualRect = new Rect();

        protected override void OnPropertyChanged(DependencyPropertyChangedEventArgs e)
        {
            if (e.Property == ContentControl.ActualHeightProperty | e.Property == ContentControl.ActualWidthProperty)
            {
                if (mainWindowHandle == IntPtr.Zero)
                {
                    HwndSource hwndSource = PresentationSource.FromVisual(App.Current.MainWindow) as HwndSource;
                    mainWindowHandle = hwndSource.Handle;
                }
                else
                {
                    Point p0 = this.TranslatePoint(new Point(),App.Current.MainWindow);
                    Point p1 = this.TranslatePoint(new Point(this.ActualWidth,this.ActualHeight),App.Current.MainWindow);
                    actualRect = new Rect(p0, p1);
                    mainWindowHandle.InvalidateAttachedPreview(actualRect);
                }
            }

public static void InvalidateAttachedPreview(this IntPtr handler, Rect viewRect)
        {
            if (pHandler != null)
            {
                RECT r = new RECT(viewRect);
                pHandler.SetRect(ref r);
            }
        }

Now, the only thing we have to do is to listen for ContentProperty change and attache the preview handlers for displayed file to the control

if (e.Property == ContentControl.ContentProperty)
            {
                mainWindowHandle.AttachPreview(e.NewValue.ToString(),actualRect);
            }

We done. Last thing to do is to implement IStream interface in our COMStream C# class in order to be able to load streaming content (for example for PDF previewer)

public sealed class COMStream : IStream, IDisposable
{
     Stream _stream;

     ~COMStream()
     {
         if (_stream != null)
         {
             _stream.Close();
             _stream.Dispose();
             _stream = null;
         }
     }

     private COMStream() { }

     public COMStream(Stream sourceStream)
     {
         _stream = sourceStream;
     }

     #region IStream Members

     public void Clone(out IStream ppstm)
     {
         throw new NotSupportedException();
     }

     public void Commit(int grfCommitFlags)
     {
         throw new NotSupportedException();
     }

     public void CopyTo(IStream pstm, long cb, IntPtr pcbRead, IntPtr pcbWritten)
     {
         throw new NotSupportedException();
     }

     public void LockRegion(long libOffset, long cb, int dwLockType)
     {
         throw new NotSupportedException();
     }

     [SecurityCritical]
     public void Read(byte[] pv, int cb, IntPtr pcbRead)
     {
         int count = this._stream.Read(pv, 0, cb);
         if (pcbRead != IntPtr.Zero)
         {
             Marshal.WriteInt32(pcbRead, count);
         }
     }

     public void Revert()
     {
         throw new NotSupportedException();
     }

     [SecurityCritical]
     public void Seek(long dlibMove, int dwOrigin, IntPtr plibNewPosition)
     {
         SeekOrigin origin = (SeekOrigin)dwOrigin;
         long pos = this._stream.Seek(dlibMove, origin);
         if (plibNewPosition != IntPtr.Zero)
         {
             Marshal.WriteInt64(plibNewPosition, pos);
         }
     }

     public void SetSize(long libNewSize)
     {
         this._stream.SetLength(libNewSize);
     }

     public void Stat(out System.Runtime.InteropServices.ComTypes.STATSTG pstatstg, int grfStatFlag)
     {
         pstatstg = new System.Runtime.InteropServices.ComTypes.STATSTG();
         pstatstg.type = 2;
         pstatstg.cbSize = this._stream.Length;
         pstatstg.grfMode = 0;
         if (this._stream.CanRead && this._stream.CanWrite)
         {
             pstatstg.grfMode |= 2;
         }
         else if (this._stream.CanWrite && !_stream.CanRead)
         {
             pstatstg.grfMode |= 1;
         }
         else
         {
             throw new IOException();
         }

     }

     public void UnlockRegion(long libOffset, long cb, int dwLockType)
     {
         throw new NotSupportedException();
     }

     [SecurityCritical]
     public void Write(byte[] pv, int cb, IntPtr pcbWritten)
     {
         this._stream.Write(pv, 0, cb);
         if (pcbWritten != IntPtr.Zero)
         {
             Marshal.WriteInt32(pcbWritten, cb);
         }
     }

     #endregion

     #region IDisposable Members

     public void Dispose()
     {
         if (this._stream != null)
         {
             this._stream.Close();
             this._stream.Dispose();
             this._stream = null;
         }
     }

     #endregion
}

And now we finished. We can use unmanaged preview handlers to display content of our files, hold by WPF application. Also, if you want, you can create your own preview handlers and they’ll appear in your WPF application as well as they’ll magically appear in Outlook. Following full source code for this article

Source code for this article >>

Good day, Happy Passover and, as always, be good people.

Thursday, April 17, 2008

Converting FixedDocument (XPSDocument too) to FlowDocument

First of all, what’s the differences between FixedDocument and FlowDocument and why we can convert FlowDocument into FixedDocument easily but not vice verse? Let’s try to understand

What is FixedDocument? FixedDocument is a host for portable, high fidelity, fixed-format document with read access for user text selection, keyboard navigation, and search (MSDN). Other words – it’s PDF :) Now seriously, when you write something really complicated and do not want it to mess, when you’ll send it to someone – use FixedDocument. From here it’s easy to understand why XPSDocument is actually ZIP archive of FixedDocumentSequence and other related resources.

What it FlowDocument? Flow documents are designed to optimize viewing and readability. Rather than being set to one predefined layout, flow documents dynamically adjust and reflow their content based on run-time variables such as window size, device resolution, and optional user preferences. In addition, flow documents offer advanced document features, such as pagination and columns. This topic provides an overview of flow documents and how to create them. (MSDN). Other words it will not mess, but it is adaptive for your reader. It has no “hard-coded” cuts, however it formatted. So, as for me, FlowDocument is better.

This is very cool. Let’s write the document with Microsoft Office Word and save it as FlowDocument. It make our document very adaptive and easy for reading. Well, that’s the problem. All you may do is to save (actually print) Word document as XPS file.

Now what. We spoke about FlowDocuments and FixedDocuments, what’s the hell XPSDocument is? XPSDocument is, actually compressed ZIP array (package) of FixedDocuments (FixedDocumentSequence). So we have no other chance, but try to make FixedDocuments more adaptive. Other words -  convert them into FlowDocuments. Let’s start

As I wrote earlier, XPSDocument is actually package. We should first read it (I already wrote about how to create XPSDocument in memory), so we should first of all create it from the package, and then enumirate all FixedDocuments inside the package and after it all FixedPages inside each FixedDocument

XpsDocument _doc = new XpsDocument(pkg, CompressionOption.Fast, pack);
IXpsFixedDocumentSequenceReader fixedDocSeqReader = _doc.FixedDocumentSequenceReader;

foreach (IXpsFixedDocumentReader docReader in fixedDocSeqReader.FixedDocuments)
            {
                foreach (IXpsFixedPageReader fixedPageReader in docReader.FixedPages)
                {

Well, what is FixedPage? FixedPage provides the content for a high fidelity, fixed-format page. (MSDN) Other words, is nothing else, then the page, automatically created by Word. We do not really need it – remember, we want it adaptive

Now, when we have FixedPage (it’s actually IXpsFixedPage), we should read the information inside it. How to do it? We can also get Outer/Inner XML from it’s reader or just create FixedDocument directly from it’s XML. I’ll use string option (why? keep reading). So, while we can read, just get all OuterXml and put it into regular string. Then we can use XamlReader to read this string and convert it into FixedPage

while (fixedPageReader.XmlReader.Read())
                    {
string page = fixedPageReader.XmlReader.ReadOuterXml();
FixedPage fp = XamlReader.Load(new MemoryStream(Encoding.Default.GetBytes(page))) as FixedPage;

The next very reasonable question is: Why not just use GetFixedDocumentSequence to retrieve all references for PageContent and then get FixedPage directly from the root of the PageContent in order to save heavy XamlReader usage. Like this:

foreach (DocumentReference dr in _doc.GetFixedDocumentSequence().References)
            {
                foreach (PageContent pc in dr.GetDocument(false).Pages)
                {
                    FixedPage fp = pc.GetPageRoot(false);
                    BlockUIContainer cont = new BlockUIContainer();
                    cont.Child = fp;
                    fdoc.Blocks.Add(cont);
                }
            }

Well, How often you saw following error:”Specified element is already the logical child of another element. Disconnect it first.”? That’s exactly the problem. Even using this method, you should Clone XAML object. How to do it (you really do not know?) – XamlReader(XamlWriter). So you’ll save nothing (even loss some)

So far so good. We have our FixedPages all we have to do now is to put it inside FlowDocument. Am I right? Not so fast. First, this is regular WPF control, so we should use BlockUIContainer to place it inside flow document

BlockUIContainer cont = new BlockUIContainer();
cont.Child = fp;
fdoc.Blocks.Add(cont);

Now let’s run the program. What’s the hell is “Cannot locate resource 'documents/1/resources/fonts/e87fcd50-6c36-40ca-928a-dd5e97fd0c52.odttf'”? What is ODTTF what files? I did not put any files inside my Word document. Let’s see the result page. This will looks like this:

<FixedPage Width="816" Height="1056" xmlns="http://schemas.microsoft.com/xps/2005/06" xml:lang="und">

<Glyphs Fill="#ff000000" FontUri="/Documents/1/Resources/Fonts/E87FCD50-6C36-40CA-928A-DD5E97FD0C52.odttf" FontRenderingEmSize="14.6921" StyleSimulations="None" OriginX="96" OriginY="109.76" Indices="62;381,54;396,33;286,51;373,79;3;349;393,52;400,40;437,52;373;3;282,52;381;367,22;381,54;396,34;3;400,40;349;410,32;3;258;373;286,49;410;853;3;272;381;374,52;400;286;272,43;410,33;286;410;437,52;286;396,34;3;258,49;282,52;349;393,52;349;400;272;349;374,52;336;3;286,49;367;349;410;856;3;115;349;448;258,47;373;437;400;3;286,49;410;3;367,24;349,22;336;437,52;367;258;3;258;410,33;3;395;437,52;258;373,81;3,21;448,46;286;346;349;272;437,52;367;258;3;437;367;410;396;349,22;272;286;400;856;3" UnicodeString="Lorem ipsum dolor sit amet, consectetuer adipiscing elit. Vivamus et ligula at quam vehicula ultrices." />

<Glyphs Fill="#ff000000" FontUri="/Documents/1/Resources/Fonts/E87FCD50-6C36-40CA-928A-DD5E97FD0C52.odttf" FontRenderingEmSize="14.6921" StyleSimulations="None" OriginX="96" OriginY="130.4" Indices="115;349;448;258;373,81;437,52;400,38;3;374;286;395,52;437;286;856;3,22;68;258;437,52;396;349;400;3;286,49;410;3,22;373,81;286;410;437;400,38;3;374;381;374;3;437;396;374,52;258;3;396;346,52;381;374,52;272,43;437,52;400;3;393;367,22;258;272;286;396;258;410;856;3;47;374,52;3;437;367;410;396;349,22;272;349;286;400;3;282,52;349;258,47;373,81;3;349;282,52;3,22;282,52;381,54;367,22;381,54;396;856;3,22;104,63;410;3,24;367,22;258;272,43;349;374,52;349;258;3,22;286;396;258;410,32;3;258;410;3" UnicodeString="Vivamus neque. Mauris et metus non urna rhoncus placerat. In ultricies diam id dolor. Ut lacinia erat at" />

So, e87fcd50-6c36-40ca-928a-dd5e97fd0c52.odttf is actually font. Let’s just save it as font. In order to do it, we should first get all from our XPSPackage. Then save it as stream and change links to our font file. This is easy

foreach (XpsFont font in fixedPageReader.Fonts)
                       {

using (Stream stm = font.GetStream())
            {
                using (FileStream fs = new FileStream(path, FileMode.Create))
                {
                    byte[] dta = new byte[stm.Length];
                    stm.Read(dta, 0, dta.Length);
                    fs.Write(dta, 0, dta.Length);
                }
            }

Good. Now we have file, located in place we can refer to. Let’s load it. WTF is “file:///E87FCD50-6C36-40CA-928A-DD5E97FD0C52.odttf' file does not conform to the expected file format ”? What you expected for? This is font. I promise, I SWEAR! Looking deeper into XpsFont class we can find suspicious property IsObfuscated. What is it? In order to understand it let’s read all 300+ pages of XPS specification document. In chapter 2.1.7.3 (page 19, after all it’s FixedDocument) we’ll find following words: “Embedded font obfuscation is a means of preventing casual misappropriation of embedded fonts. Specifically, embedded font obfuscation prevents end-users from using standard ZIP utilities to extract fonts from XPS Document files and install them on their systems.  Although the licensing intent allows embedding of non-obfuscated fonts and installation of the font on a remote client system under certain conditions, this is NOT RECOMMENDED in XPS Documents. Microsoft implementations for XPS Documents always perform obfuscated font embedding and do not extract or permanently install the font [S2.19]. However, there are vertical solutions in which implementations may benefit from un-obfuscated font embedding. In these cases, implementations could omit obfuscation or extract and install the embedded font. “.

Well, how to hack it?

  1. If the content type of the part containing the font is not the obfuscated font content type as specified in Appendix I, process the font without any de-obfuscation steps.
  2. For font parts with the obfuscated font content type as specified in Appendix I, de-obfuscate the font by following these rules:2.
    1. Remove the extension from the last segment of the name of the part containing the font.
    2. Convert the remaining characters of the last segment to a GUID using the byte ordering described above.
    3. Perform an XOR operation on the first 32 bytes of the binary data of the obfuscated font part with the array consisting of the bytes referred to by the placeholders B37, B36, B35, B34, B33, B32, B31, B30, B20, B21, B10, B11, B00, B01, B02, and B03, in that order and repeating the array once. The result is a non-obfuscated font.
    4. Use the non-obfuscated font for the duration of the document processing, but do not leave any local or otherwise user-accessible copy of the non-obfuscated font.

Very well. Let’s write such attached method (I love them)

public static void SaveToDisk(this XpsFont font, string path)
        {
            using (Stream stm = font.GetStream())
            {
                using (FileStream fs = new FileStream(path, FileMode.Create))
                {
                    byte[] dta = new byte[stm.Length];
                    stm.Read(dta, 0, dta.Length);
                    if (font.IsObfuscated)
                    {
                        string guid = new Guid(font.Uri.GetFileName().Split('.')[0]).ToString("N");
                        byte[] guidBytes = new byte[16];
                        for (int i = 0; i < guidBytes.Length; i++)
                        {
                            guidBytes[i] = Convert.ToByte(guid.Substring(i * 2, 2), 16);
                        }

                        for (int i = 0; i < 32; i++)
                        {
                            int gi = guidBytes.Length - (i % guidBytes.Length) - 1;
                            dta[i] ^= guidBytes[gi];
                        }
                    }
                    fs.Write(dta, 0, dta.Length);
                }
            }
        }

Now we can save and load obfuscated XPS Fonts. What’s next? Replace it’s locations inside FixedPages. In order to do this, we’ll write another set of attached methods. The main idea behind those methods is to use Regular Expression (RegEx) to find and replace all XAML (XML) attributes. This is the king: “{0}(?:\s*=\s*(""[^""]{1}""|[^\s>]*))?”

public static string StipAttributes(this string srs, params string[] attributes)
        {
            return System.Text.RegularExpressions.Regex.Replace(srs,
                string.Format(@"{0}(?:\s*=\s*(""[^""]*""|[^\s>]*))?",
                string.Join("|", attributes)),
                string.Empty,
                System.Text.RegularExpressions.RegexOptions.IgnoreCase | System.Text.RegularExpressions.RegexOptions.Compiled);
        }

        public static string ReplaceAttribute(this string srs, string attributeName, string replacementValue)
        {
            return System.Text.RegularExpressions.Regex.Replace(srs,
                string.Format(@"{0}(?:\s*=\s*(""[^""]*""|[^\s>]*))?", attributeName),
                string.Format("{0}=\"{1}\"", attributeName, replacementValue),
                System.Text.RegularExpressions.RegexOptions.IgnoreCase | System.Text.RegularExpressions.RegexOptions.Compiled);
        }

        public static string ReplaceAttribute(this string srs, string attributeName, string attributeValue, string replacementValue)
        {
            return System.Text.RegularExpressions.Regex.Replace(srs,
                string.Format(@"{0}(?:\s*=\s*(""[^""]{1}""|[^\s>]*))?", attributeName,attributeValue),
                string.Format("{0}=\"{1}\"", attributeName, replacementValue),
                System.Text.RegularExpressions.RegexOptions.IgnoreCase | System.Text.RegularExpressions.RegexOptions.Compiled);
        }

Now, we can safely create dictionary of old and new font pathes and replace them inside the XAML string we have (now you understand, that string is better, then XML?)

foreach (XpsFont font in fixedPageReader.Fonts)
                        {
                            string name = font.Uri.GetFileName();
                            path = string.Format(@"{0}\{1}", Environment.GetFolderPath(Environment.SpecialFolder.ApplicationData), name);

                            if (!fontList.ContainsKey(font.Uri.OriginalString))
                            {
                                fontList.Add(font.Uri.OriginalString, path);
                                font.SaveToDisk(path);
                            }
                        }

foreach(KeyValuePair<string,string> val in fontList)
                        {
                            page = page.ReplaceAttribute("FontUri", val.Key,val.Value);
                        }

The same thing we’ll do for images

foreach (XpsImage image in fixedPageReader.Images)
                        {
                            //here to get images
                        }

Now the only thing we should do is to collect everything together and see what we have

image

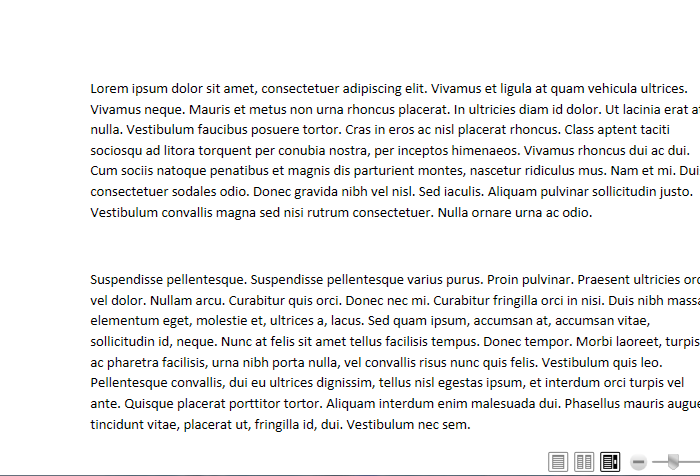
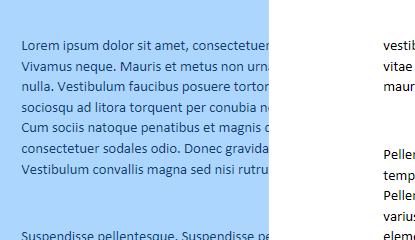
Well it works, but it still is not adaptive enough

image

It’s just flow representation of fixed document. You see (I select one element – this is whole BlockUIContainer). Also all texts will be wrapped to “adaptive size”.

image


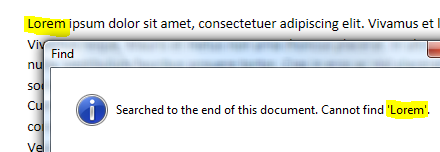
What to do? Let’s see another time on FixedPage we got. It uses glyphs to present information. This might be very good, when you do not want to format it. In my case, I want it. I want also be able to search and select separate words. What should I do?

<FixedPage Width="816" Height="1056" xmlns="http://schemas.microsoft.com/xps/2005/06" xml:lang="und">

<Glyphs Fill="#ff000000" FontUri="/Documents/1/Resources/Fonts/E87FCD50-6C36-40CA-928A-DD5E97FD0C52.odttf" FontRenderingEmSize="14.6921" StyleSimulations="None" OriginX="96" OriginY="109.76" Indices="62;381,54;396,33;286,51;373,79;3;349;393,52;400,40;437,52;373;3;282,52;381;367,22;381,54;396,34;3;400,40;349;410,32;3;258;373;286,49;410;853;3;272;381;374,52;400;286;272,43;410,33;286;410;437,52;286;396,34;3;258,49;282,52;349;393,52;349;400;272;349;374,52;336;3;286,49;367;349;410;856;3;115;349;448;258,47;373;437;400;3;286,49;410;3;367,24;349,22;336;437,52;367;258;3;258;410,33;3;395;437,52;258;373,81;3,21;448,46;286;346;349;272;437,52;367;258;3;437;367;410;396;349,22;272;286;400;856;3" UnicodeString="Lorem ipsum dolor sit amet, consectetuer adipiscing elit. Vivamus et ligula at quam vehicula ultrices." />

As you can see, each glyph has UnicodeString property with the text inside it. This what I need. Simple DOM operation and I have all texts from the document. Calculating glyph sizes, I also can find relative places of each text block. This I can make it “Flow and adaptive”.

Want to? Download the source for this article and do it. This is easy part of the sequence. I promise (I also put clues in code).

Have a nice day and be good people.