Showing posts with label source. Show all posts

Friday, December 12, 2008

Reading and decoding RDS (Radio Data System) in C#

RDS or Radio Data System is very common in US and many European countries. It is communication protocol used to send small amount of digital information using regular FM radio broadcast. This protocol is used to "tell" your receiver about alternative frequencies, time, program notifications, program types, traffic information and regular text (such as singer name or genre). Unfortunately in Israel RDS is not very common and there is very limited number of radio stations broadcasts RDS information.

image

How RDS works?

As mentioned earlier, it uses FM subcarrier to broadcast digital information. It was designed to support 10 and 18 characters numeric and 80 characters alphanumeric displays. RDS operates at 1187.5 bps and based on 26-bit word consisting of 16 data and 10 error detection bits. Due to the fact, that FM carrier is not very reliable, error code allows correct information to be received even if an error of 3-5 bits exists within 26 bit block. Each four data blocks interpreted as 104-bit signal and named "group". Depending of the type of information, contained within the group, as different group type code is defined and transmitted within the group as upper five bits code. Even if more, then 104 bits required to completely send the information, there is no requirement that the next segment of the transmission be sent in the next group. There are 32 known groups types, defined by RFC:

private enum groupType : byte {
   RDS_TYPE_0A = (0 * 2 + 0),
   RDS_TYPE_0B = (0 * 2 + 1),
   RDS_TYPE_1A = (1 * 2 + 0),
   RDS_TYPE_1B = (1 * 2 + 1),
   RDS_TYPE_2A = (2 * 2 + 0),
   RDS_TYPE_2B = (2 * 2 + 1),
   RDS_TYPE_3A = (3 * 2 + 0),
   RDS_TYPE_3B = (3 * 2 + 1),
   RDS_TYPE_4A = (4 * 2 + 0),
   RDS_TYPE_4B = (4 * 2 + 1),
   RDS_TYPE_5A = (5 * 2 + 0),
   RDS_TYPE_5B = (5 * 2 + 1),
   RDS_TYPE_6A = (6 * 2 + 0),
   RDS_TYPE_6B = (6 * 2 + 1),
   RDS_TYPE_7A = (7 * 2 + 0),
   RDS_TYPE_7B = (7 * 2 + 1),
   RDS_TYPE_8A = (8 * 2 + 0),
   RDS_TYPE_8B = (8 * 2 + 1),
   RDS_TYPE_9A = (9 * 2 + 0),
   RDS_TYPE_9B = (9 * 2 + 1),
   RDS_TYPE_10A = (10 * 2 + 0),
   RDS_TYPE_10B = (10 * 2 + 1),
   RDS_TYPE_11A = (11 * 2 + 0),
   RDS_TYPE_11B = (11 * 2 + 1),
   RDS_TYPE_12A = (12 * 2 + 0),
   RDS_TYPE_12B = (12 * 2 + 1),
   RDS_TYPE_13A = (13 * 2 + 0),
   RDS_TYPE_13B = (13 * 2 + 1),
   RDS_TYPE_14A = (14 * 2 + 0),
   RDS_TYPE_14B = (14 * 2 + 1),
   RDS_TYPE_15A = (15 * 2 + 0),
   RDS_TYPE_15B = (15 * 2 + 1)
}

Not all groups are in use all the time. However, there are some commitments, defined by the protocol. For example, 1A have to be transmitted at least once a second. This group contains special information, required for receivers to be synchronized and locked into the transmitting channel.

Within the error correction information we also receive the direction to treat them.

private enum correctedType : byte {
   NONE = 0,
   ONE_TO_TWO = 1,
   THREE_TO_FIVE = 2,
   UNCORRECTABLE = 3
}

Also, each message type has it own limits. For example RT (Radio Text - 64 character text to display on your receiver) and PS (Programme Service - eight character station identification) message are limited to 2 groups, when PI (Programme Identification - unique code of the station) and PTY (Programme Type - one of 31 predefined program types - e.g. News, Drama, Music) are limited to 4.

In addition to those constraints, block types are also different. But in this case, there are only 4 kinds

private enum blockType : byte {
   A = 6,
   B = 4,
   C = 2,
   D = 0
}

So, what we're waiting for? Let's start working.

Handling errors

First of all we should take care on errors and fix them if possible. For this purpose, we should first count them and detect the way of fixing

var errorCount = (byte)((registers[0xa] & 0x0E00) >> 9);
var errorFlags = (byte)(registers[0x6] & 0xFF);
if (errorCount < 4) {
   _blocksValid += (byte)(4 - errorCount);
} else { /*drop data on more errors*/ return; }

Once it done, we can try to fix them

//Also drop the data if more than two errors were corrected
if (_getErrorsCorrected(errorFlags, blockType.B) > correctedType.ONE_TO_TWO) return;

private correctedType _getErrorsCorrected(byte data, blockType block) { return (correctedType)((data >> (byte)block) & 0x30); }

Now, our registers should be fine and we can start the detection of group type

Group Type Detection

This is very simple task, all we have to do is to get five upper bites to get a type and version.

var group_type = (groupType)(registers[0xD] >> 11);

Then we can handle PI and PTY, which we always have in RDS.

PI and PTY treatment

Now, let's update pi code, due to the fact, that B format always have PI in words A and C

_updatePI(registers[0xC]);

if (((byte)group_type & 0x01) != 0) {
_updatePI(registers[0xE]);
}

To update PI, we should check whether the new value is different from the previous and update it only in case it changed.

private void _updatePI(byte pi) {
   uint rds_pi_validate_count = 0;
   uint rds_pi_nonvalidated = 0;

   // if the pi value is the same for a certain number of times, update a validated pi variable
   if (rds_pi_nonvalidated != pi) {
      rds_pi_nonvalidated = pi;
      rds_pi_validate_count = 1;
   } else {
      rds_pi_validate_count++;
   }

   if (rds_pi_validate_count > PI_VALIDATE_LIMIT) {
      _piDisplay = rds_pi_nonvalidated;
   }
}

Then we will update PTY

_updatePTY((byte)((registers[0xd] >> 5) & 0x1f));

PTY treatment is very similar to PI, however it can be multiplied.

private void _updatePTY(byte pty) {
   uint rds_pty_validate_count = 0;
   uint rds_pty_nonvalidated = 0;

   // if the pty value is the same for a certain number of times, update a validated pty variable
   if (rds_pty_nonvalidated != pty) {
      rds_pty_nonvalidated = pty;
      rds_pty_validate_count = 1;
   } else {
      rds_pty_validate_count++;
   }

   if (rds_pty_validate_count > PTY_VALIDATE_LIMIT) {
      _ptyDisplay = rds_pty_nonvalidated;
   }
}

When we done with those two groups, we can start handling another. Today, we'll handle only 0B, 2A and 2B types (I have a good reason for it, due to the fact, that only those are supported in Israel by now :) ) So,

Handling PS and different RTs

Simple switch on those groups

switch (group_type) {
   case groupType.RDS_TYPE_0B:
      addr = (byte)((registers[0xd] & 0x3) * 2);
      _updatePS((byte)(addr + 0), (byte)(registers[0xf] >> 8));
      _updatePS((byte)(addr + 1), (byte)(registers[0xf] & 0xff));
      break;
   case groupType.RDS_TYPE_2A:
      addr = (byte)((registers[0xd] & 0xf) * 4);
      abflag = (byte)((registers[0xb] & 0x0010) >> 4);
      _updateRT(abflag, 4, addr, (byte[])registers.Skip(0xe), errorFlags);
      break;
   case groupType.RDS_TYPE_2B:
      addr = (byte)((registers[0xd] & 0xf) * 2);
      abflag = (byte)((registers[0xb] & 0x0010) >> 4);
      // The last 32 bytes are unused in this format
      _rtTmp0[32] = 0x0d;
      _rtTmp1[32] = 0x0d;
      _rtCnt[32] = RT_VALIDATE_LIMIT;
      _updateRT(abflag, 2, addr, (byte[])registers.Skip(0xe), errorFlags);
      break;
}

and let's dig into PS.

In PS, we have high and low probability bits. So, if new bit in sequence matches the high probability bite and we have recieved enough bytes to max out the counter, we'll push it into the low probability array.

if (_psTmp0[idx] == default(byte)) {
           if (_psCnt[idx] < PS_VALIDATE_LIMIT) {
               _psCnt[idx]++;
            } else {
               _psCnt[idx] = PS_VALIDATE_LIMIT;
               _psTmp1[idx] = default(byte);
            }
         }

Else, if new byte matches with the low probability byte, we should swap them and then reset the counter, by flagging the text as in transition.

else if (_psTmp1[idx] == default(byte)) {
            if (_psCnt[idx] >= PS_VALIDATE_LIMIT) {
               isTextChange = true;
            }
            _psCnt[idx] = PS_VALIDATE_LIMIT + 1;
            _psTmp1[idx] = _psTmp0[idx];
            _psTmp0[idx] = default(byte);
         }

When we have an empty byte in high probability array or new bytes does not match anything we know, we should put it into low probability array.

else if (_psCnt[idx] == null) {
            _psTmp0[idx] = default(byte);
            _psCnt[idx] = 1;
         } else {
            _psTmp1[idx] = default(byte);
         }

Now, if we marked our text as changed, we should decrement the count for all characters to prevent displaying of partical message, which in still in transition.

         if (isTextChange) {
            for (byte i = 0; i < _psCnt.Length; i++) {
               if (_psCnt[i] > 1) {
                  _psCnt[i]--;
               }
            }
         }

Then by checking PS text for incompetence, when there are characters in high probability array has been seen fewer times, that was limited by validation.

         for (byte i = 0; i < _psCnt.Length; i++) {
            if (_psCnt[i] < PS_VALIDATE_LIMIT) {
               isComplete = false;
               break;
            }
         }

Only if PS text in the high probability array is complete, we'll copy it into display.


         if (isComplete) {
            for (byte i = 0; i < _psDisplay.Length; i++) {
               _psDisplay[i] = _psTmp0[i];
            }
         }

It is not very hard to treat PS. Isn't it? Let's see what's going on with RT.

If A and B message flag changes, we'll try to force a display by increasing the validation count for each byte. Then, we'll wipe any cached text.

   if (abFlag != _rtFlag && _rtFlagValid) {
      // If the A/B message flag changes, try to force a display
      // by increasing the validation count of each byte
      for (i = 0; i < _rtCnt.Length; i++) _rtCnt[addr + i]++;
      _updateRTValue();

      // Wipe out the cached text
      for (i = 0; i < _rtCnt.Length; i++) {
         _rtCnt[i] = 0;
         _rtTmp0[i] = 0;
         _rtTmp1[i] = 0;
      }
   }

Now A and B flags are safe, sp we can start with message processing. First of all, NULL in RDS means space :)


   _rtFlag = abFlag;    
   _rtFlagValid = true;   

   for (i = 0; i < count; i++) {
      if (p[i] == null) p[i] = (byte)' ';

The new byte matches the high probability byte also in this case. We habe to recieve this bite enough to max out counters. Then we can push it into the low probability as well.

      if (_rtTmp0[addr + i] == p[i]) {
         if (_rtCnt[addr + i] < RT_VALIDATE_LIMIT) _rtCnt[addr + i]++;
         else {
            _rtCnt[addr + i] = RT_VALIDATE_LIMIT;
            _rtTmp1[addr + i] = p[i];
         }
      }

When the new byte matches with low probability byte, we'll swap them as well and reset counters to update text in transition flag. However in this case, our counter will go higher, then the validation limit. So we'll have to remove it down later.

else if (_rtTmp1[addr + i] == p[i]) {

         if (_rtCnt[addr + i] >= PS_VALIDATE_LIMIT) isChange = true;

         _rtCnt[addr + i] = RT_VALIDATE_LIMIT + 1;
         _rtTmp1[addr + i] = _rtTmp0[addr + i];
         _rtTmp0[addr + i] = p[i];
      }

Now, the new byte is replaced an empty byte in the high probability array. Also, if this byte does not match anything, we should move it into low probability.

else if (_rtCnt[addr + i] == null) { 
         _rtTmp0[addr + i] = p[i];
         _rtCnt[addr + i] = 1;
      } else _rtTmp1[addr + i] = p[i];

   }

Now when the text is changing, we'll decrement the counter for all characters exactly as we did for PS.


      for (i = 0; i < _rtCnt.Length; i++) {
         if (_rtCnt[i] > 1) _rtCnt[i]--;
      }
   }

However, right after, we'll update display. 

   _updateRTValue();
}

Displaying RT

But how to convert all those byte arrays into readable message? Simple :)

First of all if text is incomplete, we should keep loading it. Also it makes sense to check whether the target array is shorter then maximum allowed to prevent junk from being displayed.

for (i = 0; i < _rtTmp0.Length; i++) {
   if (_rtCnt[i] < RT_VALIDATE_LIMIT) {
      isComplete = false;
      break;
   }
   if (_rtTmp0[i] == 0x0d) {
      break;
   }
}

Now, when our Radio Text is in the high probability and it complete, we should copy buffers.

if (isComplete) {
   _Text = string.Empty;

   for (i = 0; i < _rtDisplay.Length; i += 2) {
      if ((_rtDisplay[i] != 0x0d) && (_rtDisplay[i + 1] != 0x0d)) {
         _rtDisplay[i] = _rtTmp0[i + 1];
         _rtDisplay[i + 1] = _rtTmp0[i];
      } else {
         _rtDisplay[i] = _rtTmp0[i];
         _rtDisplay[i + 1] = _rtTmp0[i + 1];
      }

      if (_rtDisplay[i] != 0x0d)
         _Text += _rtDisplay[i];

      if (_rtDisplay[i + 1] != 0x0d)
         _Text += _rtDisplay[i + 1];

      if ((_rtDisplay[i] == 0x0d) || (_rtDisplay[i + 1] == 0x0d))
         i = (byte)_rtDisplay.Length;
   }

And not forget to wipe out everything after the end of the message :)


   for (i++; i < _rtDisplay.Length; i++) {
      _rtDisplay[i] = 0;
      _rtCnt[i] = 0;
      _rtTmp0[i] = 0;
      _rtTmp1[i] = 0;
   }
}

And finally update the text

Text = _Text;

We done. Now we can handle RDS digital messages, but what to do with analog data we get? Don't you already know? I blogged about it here.

Have a nice day and be good people, because you know how to write client, knows to get and parse radio data in managed code.


image

Wednesday, November 19, 2008

How to P/Invoke VarArgs (variable arguments) in C#? ... or hidden junk in CLR

Recently I wrote a cheat sheet for pinvoking in .NET. Shortly after I got a question in comments about how to deal with variable arguments, when it's more, then one parameter. Also what to do if those arguments are heterogeneous?

Let's say, that we have following method in C:

int VarSum(int nargs, ...){
    va_list argp;
    va_start( argp, nargs );
    int sum = 0;
    for( int i = 0 ; i < nargs; i++ ) {
        int arg = va_arg( argp, int );
        sum += arg;
    }
    va_end( argp );

    return sum;
}

We can expose this method to C# as following:

[System.Runtime.InteropServices.DllImportAttribute("unmanaged.dll", EntryPoint = "VarSum")]
        public static extern int VarSum(int nargs,int arg1);

[System.Runtime.InteropServices.DllImportAttribute("unmanaged.dll", EntryPoint = "VarSum")]
        public static extern int VarSum(int nargs,int arg1,int arg2);

[System.Runtime.InteropServices.DllImportAttribute("unmanaged.dll", EntryPoint = "VarSum")]
        public static extern int VarSum(int nargs,int arg1,int arg2,int arg3);

etc...

And it will work. However, if you'll try to expose it as int array, marshaller will fail to understand how to align things

[System.Runtime.InteropServices.DllImportAttribute("unmanaged.dll", EntryPoint = "VarSum")]
        public static extern int VarSum(int nargs,int[] arg);

This in spite of the fact, that this method will work properly with another signature

int ArrSum(int* nargs) {
    int sum = 0;
    for( int i = 0 ; i < 2; i++ ) {
        sum += nargs[i];
    }
    return sum;
}

So what to do? The official answer is - you have nothing to do, rather then override all possibilities. This is very bad and absolutely not flexible. So, there is small class in C#, named ArgIterator. This one is similar to params object[], but knows to marshal into varargs. The problem is, that you have no way to add things inside. It's "kind-of-read-only".

Let's look into reflected version of ArgIterator. We'll see there something, named __arglist and __refvalue. OMG, isn't it good old stuff similar to "__declspec(dllexport) int _stdcall" etc.? It is! But can we use it in C#? We can! Just sign your method as Cdecl and you have working signature for "..."

[System.Runtime.InteropServices.DllImportAttribute("unmanaged.dll", EntryPoint = "VarSum",
            CallingConvention=System.Runtime.InteropServices.CallingConvention.Cdecl)]
        public static extern int VarSum(int nargs, __arglist);

Yes, looks strange, and absolutely not CLR compliant. However, this is the only way to expose varargs to CLR via P/Invoke. How to use it? Simple:

c = VarSum(2, __arglist(5, 10));

Have a nice day and be good people. Also, my question to Microsoft is why this stuff is not in MSDN and we, as developers, have no way to get rid of it.

Is not it very good practices to use non-compliant methods? Give us another way to do it!
Is not it very good practices to use variable arguments in unmanaged method signatures? So why you want dynamic types in C# 4?

Source code for this article

Monday, November 10, 2008

Auto scroll ListBox in WPF

In WinForms era it was very simple to autoscroll listbox content in order to select last or newly added item. It become a bit complicated in WPF. However, complicated does not mean impossible.

image

As for me, Microsoft should add this feature to base ListBox implementation as another attempt to be attractive environment for LOB application. See, for example this thread from MSDN forums. I'm really understand this guy. He do not want to implement it with a lot of code, he just want it to be included in core WPF control (but he should mark answers)

Generally, the simplest way to it is by using attached properties. So, your code will look like this

<ListBox Height="200" l:SelectorExtenders.IsAutoscroll="true" IsSynchronizedWithCurrentItem="True" Name="list"/>

But what's going on under the hoods? There it bit complicated :) First of all, we should create attached property, named IsAutoscroll

public class SelectorExtenders : DependencyObject {

        public static bool GetIsAutoscroll(DependencyObject obj) {
            return (bool)obj.GetValue(IsAutoscrollProperty);
        }

        public static void SetIsAutoscroll(DependencyObject obj, bool value) {
            obj.SetValue(IsAutoscrollProperty, value);
        }

        public static readonly DependencyProperty IsAutoscrollProperty =
            DependencyProperty.RegisterAttached("IsAutoscroll", typeof(bool), typeof(SelectorExtenders), new UIPropertyMetadata(default(bool),OnIsAutoscrollChanged));

now handle it when you set it's value by handling new items arrivals, set current and then scroll into it

public static void OnIsAutoscrollChanged(DependencyObject s, DependencyPropertyChangedEventArgs e) {
            var val = (bool)e.NewValue;
            var lb = s as ListBox;
            var ic = lb.Items;
            var data = ic.SourceCollection as INotifyCollectionChanged;

            var autoscroller = new System.Collections.Specialized.NotifyCollectionChangedEventHandler(
                (s1, e1) => {
                    object selectedItem = default(object);
                    switch (e1.Action) {
                        case NotifyCollectionChangedAction.Add:
                        case NotifyCollectionChangedAction.Move: selectedItem = e1.NewItems[e1.NewItems.Count - 1]; break;
                        case NotifyCollectionChangedAction.Remove: if (ic.Count < e1.OldStartingIndex) { selectedItem = ic[e1.OldStartingIndex - 1]; } else if (ic.Count > 0) selectedItem = ic[0]; break;
                        case NotifyCollectionChangedAction.Reset: if (ic.Count > 0) selectedItem = ic[0]; break;
                    }

                    if (selectedItem != default(object)) {
                        ic.MoveCurrentTo(selectedItem);
                        lb.ScrollIntoView(selectedItem);
                    }
                });

            if (val) data.CollectionChanged += autoscroller; 
            else  data.CollectionChanged -= autoscroller;

        }

That's all. Also it can be done by visual tree querying (as thread started proposed). Find scrollviewer inside the ListBox visual tree and then invoke "ScrollToEnd" method of it.

Have a nice day and be good people. And, yes, WPF development team should consider this feature implemented internally for any Selector and ScrollViewer control

Source code for this article

Sunday, October 05, 2008

Silverlight Bidi Controls Library RC0 and movement from Beta 2 to RC0

Finally, I got free minute to convert Silverlight BiDi controls from Silverlight beta 2 to RC0 (you can download SL rc0 tools for VS2008 here) and as usual some breaking changes (the full list is here)

  • Calendar and DatePicker moved from System.Windows.Controls.Extended into System.Windows.Controls – Extended namespace is now deprecated.
  • CalendarButton is not inside System.Windows.Controls.Primitives
  • TypeConverter.CanConvertFrom(Type sourceType) was changed and now it has new first parameter ITypeDescriptorContext context
  • TypeConverter.CanConvertFrom(object value) was changed and now it has new first parameter ITypeDescriptorContext context and second parameter System.Globalization.CultureInfo culture
  • TypeConverter.ConvertFromString is not virtual anymore
  • TextDecorationCollectionConverter was removed
  • generic.xaml should be placed into themes directory (as in WPF)
  • VisualTransition.Duration is not VisualTransition.GeneratedDuration
  • ContentPresenter has no HorizontalContentAlignment and VerticalContentAlignment. It has HorizontalAlignment and VerticalAlignment now. Also it has no Background, Padding,TextAlignment,TextDecorations and TextWrapping properties

Those, basically, all changes done in Silverlight RTL support library. So, you can download and use the latest version within Silverlight RC0 version

Have a nice day and be good people.

Monday, September 15, 2008

WGS to UTM, UTM to WGS conversions, geo distance, azimuth and other geographical calculations in C#

"The reports of my death are greatly exaggerated"

Since my post about leaving consulting field, I got huge amount of email with questions about all community projects, I'm leading, blogging in general and specific to the future of this blog.

To make things clear, I leaved consulting, and now, I have less time and reasons to blog, however, I'm keep blogging and maintaining almost all of my community projects (see the left side of the main page to list of most of those projects). Also, I try to answer all questions, I got via emails, however it's too much to handle, thus be prepared for delays.

To be sure, I'm alive, you can follow me at twitter (it demands less time to write) :) Anyway, that you for reading my blog and supporting me

Now it's good time to write something useful for you :)

If you ever wrote GIS programs, you, probably, know, that every time we forget how to convert latlon (Latitude-Longitude or, simpler World Geographical System) coordinates into Universal Transverse Mercator coordinates and vise verse, how to calculate geographical distance from point to point, line or segment to point and line to line, how to calculate azimuth between two geo points, or how to calculate destination point, based on start coordinate, distance and bearing.

image

In order to make our life easier, I decided to post number of methods in C#, I always use to perform such GIS calculations. I believe, that those classes will help you to perform your own geographical calculations. Also, do not forget two handy functions to convert degrees to radians and vv

public static double DegToRad(double deg) { return (deg / 180.0 * Math.PI); }
public static double RadToDeg(double rad) { return (rad / Math.PI * 180.0); }

Also, there are some constants should be used, if you're calculating geo information in the Earth

const double sm_a = 6378137.0;
const double sm_b = 6356752.314;
const double sm_EccSquared = 6.69437999013e-03;
const double UTMScaleFactor = 0.9996;

Conversion WGS2UTM (LatLon2UTM)

Fist of all, we should calculate UTM zone. This one is simple

int zone = (int)(Math.Floor((latlon.Longitude + 180.0) / 6) + 1);

Now, when we have zone, we should calculate UTM central meridian, footprint of latitude and arc length of the meridian

public static double UTMCentralMeridian(int zone) { return DegToRad(-183.0 + (zone * 6.0)); }

public static double FootpointLatitude(double y) {
         /* Precalculate n (Eq. 10.18) */
         var n = (sm_a - sm_b) / (sm_a + sm_b);

         /* Precalculate alpha_ (Eq. 10.22) */
         /* (Same as alpha in Eq. 10.17) */
         var alpha_ = ((sm_a + sm_b) / 2.0) * (1 + (Math.Pow(n, 2.0) / 4) + (Math.Pow(n, 4.0) / 64));

         /* Precalculate y_ (Eq. 10.23) */
         var y_ = y / alpha_;

         /* Precalculate beta_ (Eq. 10.22) */
         var beta_ = (3.0 * n / 2.0) + (-27.0 * Math.Pow(n, 3.0) / 32.0) + (269.0 * Math.Pow(n, 5.0) / 512.0);

         /* Precalculate gamma_ (Eq. 10.22) */
         var gamma_ = (21.0 * Math.Pow(n, 2.0) / 16.0) + (-55.0 * Math.Pow(n, 4.0) / 32.0);

         /* Precalculate delta_ (Eq. 10.22) */
         var delta_ = (151.0 * Math.Pow(n, 3.0) / 96.0) + (-417.0 * Math.Pow(n, 5.0) / 128.0);

         /* Precalculate epsilon_ (Eq. 10.22) */
         var epsilon_ = (1097.0 * Math.Pow(n, 4.0) / 512.0);

         /* Now calculate the sum of the series (Eq. 10.21) */
         return y_ + (beta_ * Math.Sin(2.0 * y_)) + (gamma_ * Math.Sin(4.0 * y_)) + (delta_ * Math.Sin(6.0 * y_)) + (epsilon_ * Math.Sin(8.0 * y_));
      }

public static double ArcLengthOfMeridian(double phi) {
         /* Precalculate n */
         var n = (sm_a - sm_b) / (sm_a + sm_b);

         /* Precalculate alpha */
         var alpha = ((sm_a + sm_b) / 2.0) * (1.0 + (Math.Pow(n, 2.0) / 4.0) + (Math.Pow(n, 4.0) / 64.0));

         /* Precalculate beta */
         var beta = (-3.0 * n / 2.0) + (9.0 * Math.Pow(n, 3.0) / 16.0) + (-3.0 * Math.Pow(n, 5.0) / 32.0);

         /* Precalculate gamma */
         var gamma = (15.0 * Math.Pow(n, 2.0) / 16.0) + (-15.0 * Math.Pow(n, 4.0) / 32.0);

         /* Precalculate delta */
         var delta = (-35.0 * Math.Pow(n, 3.0) / 48.0) + (105.0 * Math.Pow(n, 5.0) / 256.0);

         /* Precalculate epsilon */
         var epsilon = (315.0 * Math.Pow(n, 4.0) / 512.0);

         /* Now calculate the sum of the series and return */
         return alpha * (phi + (beta * Math.Sin(2.0 * phi)) + (gamma * Math.Sin(4.0 * phi)) + (delta * Math.Sin(6.0 * phi)) + (epsilon * Math.Sin(8.0 * phi)));
      }

Now, we have everything to calculate UTM

public static GeoPoint MapLatLonToXY(double phi, double lambda, double lambda0) {
         /* Precalculate ep2 */
         var ep2 = (Math.Pow(sm_a, 2.0) - Math.Pow(sm_b, 2.0)) / Math.Pow(sm_b, 2.0);

         /* Precalculate nu2 */
         var nu2 = ep2 * Math.Pow(Math.Cos(phi), 2.0);

         /* Precalculate N */
         var N = Math.Pow(sm_a, 2.0) / (sm_b * Math.Sqrt(1 + nu2));

         /* Precalculate t */
         var t = Math.Tan(phi);
         var t2 = t * t;
         var tmp = (t2 * t2 * t2) - Math.Pow(t, 6.0);

         /* Precalculate l */
         var l = lambda - lambda0;

         /* Precalculate coefficients for l**n in the equations below
            so a normal human being can read the expressions for easting
            and northing
            -- l**1 and l**2 have coefficients of 1.0 */
         var l3coef = 1.0 - t2 + nu2;

         var l4coef = 5.0 - t2 + 9 * nu2 + 4.0 * (nu2 * nu2);

         var l5coef = 5.0 - 18.0 * t2 + (t2 * t2) + 14.0 * nu2 - 58.0 * t2 * nu2;

         var l6coef = 61.0 - 58.0 * t2 + (t2 * t2) + 270.0 * nu2 - 330.0 * t2 * nu2;

         var l7coef = 61.0 - 479.0 * t2 + 179.0 * (t2 * t2) - (t2 * t2 * t2);

         var l8coef = 1385.0 - 3111.0 * t2 + 543.0 * (t2 * t2) - (t2 * t2 * t2);

         var xy = new GeoPoint();
         /* Calculate easting (x) */
         xy.X = N * Math.Cos(phi) * l + (N / 6.0 * Math.Pow(Math.Cos(phi), 3.0) * l3coef * Math.Pow(l, 3.0)) + (N / 120.0 * Math.Pow(Math.Cos(phi), 5.0) * l5coef * Math.Pow(l, 5.0)) + (N / 5040.0 * Math.Pow(Math.Cos(phi), 7.0) * l7coef * Math.Pow(l, 7.0));

         /* Calculate northing (y) */
         xy.Y = ArcLengthOfMeridian(phi) + (t / 2.0 * N * Math.Pow(Math.Cos(phi), 2.0) * Math.Pow(l, 2.0)) + (t / 24.0 * N * Math.Pow(Math.Cos(phi), 4.0) * l4coef * Math.Pow(l, 4.0)) + (t / 720.0 * N * Math.Pow(Math.Cos(phi), 6.0) * l6coef * Math.Pow(l, 6.0)) + (t / 40320.0 * N * Math.Pow(Math.Cos(phi), 8.0) * l8coef * Math.Pow(l, 8.0));

         return xy;
      }

public static GeoCoord MapXYToLatLon(double x, double y, double lambda0) {
   /* Get the value of phif, the footpoint latitude. */
   double phif = FootpointLatitude(y);

   /* Precalculate ep2 */
   double ep2 = (Math.Pow(sm_a, 2.0) - Math.Pow(sm_b, 2.0)) / Math.Pow(sm_b, 2.0);

   /* Precalculate cos (phif) */
   var cf = Math.Cos(phif);

   /* Precalculate nuf2 */
   var nuf2 = ep2 * Math.Pow(cf, 2.0);

   /* Precalculate Nf and initialize Nfpow */
   var Nf = Math.Pow(sm_a, 2.0) / (sm_b * Math.Sqrt(1 + nuf2));
   var Nfpow = Nf;

   /* Precalculate tf */
   var tf = Math.Tan(phif);
   var tf2 = tf * tf;
   var tf4 = tf2 * tf2;

   /* Precalculate fractional coefficients for x**n in the equations
      below to simplify the expressions for latitude and longitude. */
   var x1frac = 1.0 / (Nfpow * cf);

   Nfpow *= Nf;   /* now equals Nf**2) */
   var x2frac = tf / (2.0 * Nfpow);

   Nfpow *= Nf;   /* now equals Nf**3) */
   var x3frac = 1.0 / (6.0 * Nfpow * cf);

   Nfpow *= Nf;   /* now equals Nf**4) */
   var x4frac = tf / (24.0 * Nfpow);

   Nfpow *= Nf;   /* now equals Nf**5) */
   var x5frac = 1.0 / (120.0 * Nfpow * cf);

   Nfpow *= Nf;   /* now equals Nf**6) */
   var x6frac = tf / (720.0 * Nfpow);

   Nfpow *= Nf;   /* now equals Nf**7) */
   var x7frac = 1.0 / (5040.0 * Nfpow * cf);

   Nfpow *= Nf;   /* now equals Nf**8) */
   var x8frac = tf / (40320.0 * Nfpow);

   /* Precalculate polynomial coefficients for x**n.
      -- x**1 does not have a polynomial coefficient. */
   var x2poly = -1.0 - nuf2;

   var x3poly = -1.0 - 2 * tf2 - nuf2;

   var x4poly = 5.0 + 3.0 * tf2 + 6.0 * nuf2 - 6.0 * tf2 * nuf2 - 3.0 * (nuf2 * nuf2) - 9.0 * tf2 * (nuf2 * nuf2);

   var x5poly = 5.0 + 28.0 * tf2 + 24.0 * tf4 + 6.0 * nuf2 + 8.0 * tf2 * nuf2;

   var x6poly = -61.0 - 90.0 * tf2 - 45.0 * tf4 - 107.0 * nuf2 + 162.0 * tf2 * nuf2;

   var x7poly = -61.0 - 662.0 * tf2 - 1320.0 * tf4 - 720.0 * (tf4 * tf2);

   var x8poly = 1385.0 + 3633.0 * tf2 + 4095.0 * tf4 + 1575 * (tf4 * tf2);

   var philambda = new GeoCoord();
   /* Calculate latitude */
   philambda.Latitude = phif + x2frac * x2poly * (x * x) + x4frac * x4poly * Math.Pow(x, 4.0) + x6frac * x6poly * Math.Pow(x, 6.0) + x8frac * x8poly * Math.Pow(x, 8.0);

   /* Calculate longitude */
   philambda.Longitude = lambda0 + x1frac * x + x3frac * x3poly * Math.Pow(x, 3.0) + x5frac * x5poly * Math.Pow(x, 5.0) + x7frac * x7poly * Math.Pow(x, 7.0);

   return philambda;
}

We done, the only thing, should be adjusted is easting and northing for UTM system

xy.X = xy.X * UTMScaleFactor + 500000.0;
xy.Y = xy.Y * UTMScaleFactor;
if (xy.Y < 0.0) xy.Y += 10000000.0;

Conversion UTM2WGS (UTM2LatLon)

After al had all thin math in previous chapter, now we should calculate opposite conversion

First adjust

x -= 500000.0;
x /= UTMScaleFactor;

/* If in southern hemisphere, adjust y accordingly. */
if (southhemi) y -= 10000000.0;

y /= UTMScaleFactor;

var cmeridian = UTMCentralMeridian(zone);

Now calculate

public static GeoCoord MapXYToLatLon(double x, double y, double lambda0) {
         /* Get the value of phif, the footpoint latitude. */
         double phif = FootpointLatitude(y);

         /* Precalculate ep2 */
         double ep2 = (Math.Pow(sm_a, 2.0) - Math.Pow(sm_b, 2.0)) / Math.Pow(sm_b, 2.0);

         /* Precalculate cos (phif) */
         var cf = Math.Cos(phif);

         /* Precalculate nuf2 */
         var nuf2 = ep2 * Math.Pow(cf, 2.0);

         /* Precalculate Nf and initialize Nfpow */
         var Nf = Math.Pow(sm_a, 2.0) / (sm_b * Math.Sqrt(1 + nuf2));
         var Nfpow = Nf;

         /* Precalculate tf */
         var tf = Math.Tan(phif);
         var tf2 = tf * tf;
         var tf4 = tf2 * tf2;

         /* Precalculate fractional coefficients for x**n in the equations
            below to simplify the expressions for latitude and longitude. */
         var x1frac = 1.0 / (Nfpow * cf);

         Nfpow *= Nf;   /* now equals Nf**2) */
         var x2frac = tf / (2.0 * Nfpow);

         Nfpow *= Nf;   /* now equals Nf**3) */
         var x3frac = 1.0 / (6.0 * Nfpow * cf);

         Nfpow *= Nf;   /* now equals Nf**4) */
         var x4frac = tf / (24.0 * Nfpow);

         Nfpow *= Nf;   /* now equals Nf**5) */
         var x5frac = 1.0 / (120.0 * Nfpow * cf);

         Nfpow *= Nf;   /* now equals Nf**6) */
         var x6frac = tf / (720.0 * Nfpow);

         Nfpow *= Nf;   /* now equals Nf**7) */
         var x7frac = 1.0 / (5040.0 * Nfpow * cf);

         Nfpow *= Nf;   /* now equals Nf**8) */
         var x8frac = tf / (40320.0 * Nfpow);

         /* Precalculate polynomial coefficients for x**n.
            -- x**1 does not have a polynomial coefficient. */
         var x2poly = -1.0 - nuf2;

         var x3poly = -1.0 - 2 * tf2 - nuf2;

         var x4poly = 5.0 + 3.0 * tf2 + 6.0 * nuf2 - 6.0 * tf2 * nuf2 - 3.0 * (nuf2 * nuf2) - 9.0 * tf2 * (nuf2 * nuf2);

         var x5poly = 5.0 + 28.0 * tf2 + 24.0 * tf4 + 6.0 * nuf2 + 8.0 * tf2 * nuf2;

         var x6poly = -61.0 - 90.0 * tf2 - 45.0 * tf4 - 107.0 * nuf2 + 162.0 * tf2 * nuf2;

         var x7poly = -61.0 - 662.0 * tf2 - 1320.0 * tf4 - 720.0 * (tf4 * tf2);

         var x8poly = 1385.0 + 3633.0 * tf2 + 4095.0 * tf4 + 1575 * (tf4 * tf2);

         var philambda = new GeoCoord();
         /* Calculate latitude */
         philambda.Latitude = phif + x2frac * x2poly * (x * x) + x4frac * x4poly * Math.Pow(x, 4.0) + x6frac * x6poly * Math.Pow(x, 6.0) + x8frac * x8poly * Math.Pow(x, 8.0);

         /* Calculate longitude */
         philambda.Longitude = lambda0 + x1frac * x + x3frac * x3poly * Math.Pow(x, 3.0) + x5frac * x5poly * Math.Pow(x, 5.0) + x7frac * x7poly * Math.Pow(x, 7.0);

         return philambda;
      }

At the end do not forget to return Latitude and Longitude in degrees, rather, then in radians

Azimuth calculation

We done with coordinates, now azimuth

public static double GetAzimuth(WGSCoord c1, WGSCoord c2) {
         var lat1 = DegToRad(c1.Latitude);
         var lon1 = DegToRad(c1.Longitude);
         var lat2 = DegToRad(c2.Latitude);
         var lon2 = DegToRad(c2.Longitude);

         return RadToDeg(Math.Asin(Math.Sin(lon1 - lon2) * Math.Cos(lat2) / Math.Sin(Math.Acos(Math.Sin(lat2) * Math.Sin(lat1) + Math.Cos(lat1) * Math.Cos(lat2) * Math.Cos(lon2 - lon1)))));
      }

Distance calculations

public static double GetDistance(WGSCoord c1, WGSCoord c2) {
         var dLat = DegToRad(c2.Latitude - c1.Latitude);
         var dLon = DegToRad(c2.Longitude - c2.Longitude);
         var a = Math.Sin(dLat / 2) * Math.Sin(dLat / 2) + Math.Cos(DegToRad(c1.Latitude)) * Math.Cos(DegToRad(c2.Latitude)) * Math.Sin(dLon / 2) * Math.Sin(dLon / 2);
         var c = 2 * Math.Atan2(Math.Sqrt(a), Math.Sqrt(1 - a));
         return sm_a * c;
      }

Final destination coordinates, based on start coordinate, bearing and distance

public static WGSCoord GetDestination(WGSCoord start, double distance, double azimuth) {
         var lat = RadToDeg(Math.Asin(Math.Sin(DegToRad(start.Latitude)) * Math.Cos(DegToRad(distance / sm_a)) + Math.Cos(DegToRad(start.Latitude)) * Math.Sin(DegToRad(distance / sm_a)) * Math.Cos(DegToRad(azimuth))));
         var lon = start.Longitude + DegToRad(Math.Atan2(Math.Sin(DegToRad(azimuth)) * Math.Sin(DegToRad(distance / sm_a)) * Math.Cos(DegToRad(start.Latitude)), Math.Cos(DegToRad(distance / sm_a)) - Math.Sin(DegToRad(start.Latitude)) * Math.Sin(DegToRad(lat))));
         return new WGSCoord(lon,lat);

      }

Midpoint calculation

public static WGSCoord GetMidpoint(WGSCoord start, WGSCoord end) {
         var dLat = DegToRad(end.Latitude - start.Latitude);
         var dLon = DegToRad(end.Longitude - start.Longitude);
         var lat2 = DegToRad(end.Latitude);
         var lat1 = DegToRad(start.Latitude);
         var lon1 = DegToRad(start.Longitude);

         var Bx = Math.Cos(lat2) * Math.Cos(dLon);
         var By = Math.Cos(lat2) * Math.Sin(dLon);
         var lat3 = Math.Atan2(Math.Sin(lat1) + Math.Sin(lat2), Math.Sqrt((Math.Cos(lat1) + Bx) * (Math.Cos(lat1) + Bx) + By * By));
         var lon3 = lon1 + Math.Atan2(By, Math.Cos(lat1) + Bx);
         return new WGSCoord(RadToDeg(lon3), RadToDeg(lat3));
      }

Rhumb lines calculation

First of all, what is rhumb lines? Rhumb lines or loxodrome is a path of constant bearing, which crosses all meridians at the same angle. This calculation is very useful, if you want to follow constant compass bearing, instead of continually adjustment of it.

public static double GetRhumbDistance(WGSCoord start, WGSCoord end) {
   var dLat = DegToRad(end.Latitude - start.Latitude);
   var dLon = DegToRad(end.Longitude - start.Longitude);
   var lat1 = DegToRad(start.Latitude);
   var lon1 = DegToRad(start.Longitude);
   var lat2 = DegToRad(end.Latitude);
   var lon2 = DegToRad(end.Longitude);

   var dPhi = Math.Log(Math.Tan(lat2 / 2 + Math.PI / 4) / Math.Tan(lat1 / 2 + Math.PI / 4));
   var q = (Math.Abs(dLat) > 1e-10) ? dLat / dPhi : Math.Cos(lat1);
   if (Math.Abs(dLon) > Math.PI) {
      dLon = dLon > 0 ? -(2 * Math.PI - dLon) : (2 * Math.PI + dLon);
   }
   return Math.Sqrt(dLat * dLat + q * q * dLon * dLon) * sm_a;
}

public static double GetRhumbBearing(WGSCoord start, WGSCoord end) {
   var dLat = DegToRad(end.Latitude - start.Latitude);
   var dLon = DegToRad(end.Longitude - start.Longitude);

   var lat1 = DegToRad(start.Latitude);
   var lon1 = DegToRad(start.Longitude);
   var lat2 = DegToRad(end.Latitude);
   var lon2 = DegToRad(end.Longitude);

   var dPhi = Math.Log(Math.Tan(lat2 / 2 + Math.PI / 4) / Math.Tan(lat1 / 2 + Math.PI / 4));
   if (Math.Abs(dLon) > Math.PI) {
      dLon = dLon > 0 ? -(2 * Math.PI - dLon) : (2 * Math.PI + dLon);
   }
   return Math.Atan2(dLon, dPhi);
}

public static WGSCoord GetRhumbDestination(WGSCoord start, WGSCoord end) {
         var lat1 = DegToRad(start.Latitude);
         var lon1 = DegToRad(start.Longitude);
         var lat2 = DegToRad(end.Latitude);
         var lon2 = DegToRad(end.Longitude);

         var d = GetRhumbDistance(start, end);
         var b = GetRhumbBearing(start, end);
         lat2 = lat1 +  d * Math.Cos(b);
         var dPhi = Math.Log(Math.Tan(lat2 / 2 + Math.PI / 4) / Math.Tan(lat1 / 2 + Math.PI / 4));
         var q = (Math.Abs(lat2 - lat1) > 1e-10) ? (lat2 - lat1) / dPhi : Math.Cos(lat1);
         var dLon = d * Math.Sin(b) / q;
         if (Math.Abs(lat2) > Math.PI / 2) lat2 = lat2 > 0 ? Math.PI - lat2 : -Math.PI - lat2;
         lon2 = (lon1 + dLon + Math.PI) % (2 * Math.PI) - Math.PI;

         return new WGSCoord(RadToDeg(lon2), RadToDeg(lat2));
      }

Conversion between decimal degrees to degrees-minutes-seconds

public static Pair<double,double> ToD_Mm(this double decCoord) {
         var degSeg = (int)decCoord;
         return new Pair<double, double>(degSeg, decCoord % degSeg * 60);
      }

Now it's good time for small math (if there were not enough until now) :) All following methods are not geo spatial oriented. All those are only geometry. The only helper method, you need here is Dot vector operation

private static double dot(Vector v1, Vector v2) { return (v1.X * v2.X + v1.Y * v2.Y); }

Get the distance between two points

private static double distance(Point p1, Point p2) {
         var a = Math.Pow(p1.X, 2) - Math.Pow(p2.X, 2);
         var b = Math.Pow(p1.Y, 2) - Math.Pow(p2.Y, 2);
         return Math.Sqrt(Math.Abs(a + b));
      }

Get the shortest distance between point and line segment

private static double distance(Point p1, Point p2, Point p) {
         var v = p1 - p2;
         var w = p - p2;

         var c1 = dot(w, v);
         if (c1 <= 0) return distance(p, p1);

         var c2 = dot(v, v);
         if (c2 <= c1) return distance(p, p2);

         var b = c1 / c2;
         Point Pb = p1 + b * v;
         return distance(p, Pb);
      }

Isn't it enough math for now? It is. Have a nice day and be good people. Next time, we'll speak about different path finding algorithms, edges, nodes and other fun math optimizations.

Tuesday, August 12, 2008

WPF DataGrid CTP is here. It’s also open source!

Huge amount of people asked me about DataGrid control in WPF. There are some 3rd parties providing this control for free and not, However, I always adviced them to wait until Microsoft will release it with (or after) Arrowhead. So here comes the King. Some boys and girls from MS WPF dev team have OS initiative and released WPF toolkit. It’s absolutely free and includes all sources. Also it renewed with WPF DataGrid CTP and other tasty Futures inside with full source aside.

Microsoft goes open source? It does!

image

Download latest WPF toolkit >>

Thursday, July 17, 2008

Arabic and Hebrew languages bidirectional support for Silverlight 2.0 beta 2

Those days, I’m, together with guys from Microsoft Egypt and Santeon, finishing development of bidirectional input and output support for Silverlight. I want you to take part in alpha testing of this solution. Please see the test form here and try it.

Also, you can download latest development build and try it yourself. Please, if you’re in any issue, report it, by using issue tracker in CodePlex.

In order to use it, all you have to do is to use custom namespace within your project and then, you’ll be able to get almost all controls, you know, but with Arabic and Hebrew RTL and LTR support. You have to set one property: FlowDirection to change the rendering method (exactly as in WPF). Here an example of usage.

<UserControl x:Class="BidiTest2.Page"
    xmlns="http://schemas.microsoft.com/winfx/2006/xaml/presentation"
    xmlns:x="http://schemas.microsoft.com/winfx/2006/xaml"
    xmlns:l="clr-namespace:System.Windows.BidiControls;assembly=BidiControls">

<l:TextBlock FlowDirection="LeftToRight" Text="שלום עולם"/>

<l:TextBox FlowDirection="RightToLeft" Text="{Binding Text, Mode=TwoWay}"/>

That’s all. Thank you for your cooperation.

image

Monday, July 07, 2008

Work process: How to use and build type converters

Today, I want to start new tag - “Work process”. Here I’m going to publish partial classes, fixes, small utilities, I’m building for myself or clients to help in work process. I’ll give an example: currently, I’m working on BiDi support for Silverlight 2.0 (beta 2 to RTM). During the work process, I need to write different classes, such as converters, string utilities, exception helpers etc.

ZK4Y7556 
© Imaginary copyright by  Noel Hendrickson

So, today I’ll public general type converter for generic classes.

What is type converter?

TypeConverter is a service attribute, used to help rendering engine to convert XAML string (usually it strings) to the type, you require in your class implementation. Here an example:

In your custom class you have dependency property of type TextAlignment

public TextAlignment TextAlignment
       {
           get { return (TextAlignment)GetValue(TextAlignmentProperty); }
           set { SetValue(TextAlignmentProperty, value); }
       }

In XAML code it will be used as:

<MyControl TextAlignment=”Left”/>

But, what you’re actually transfer to your class is string “Left”, when you need enum TextAlignment.Left, how to convert it? This for we’re using type converters

Attribute usage

In order to “tell” framework to use your type converter, you should mark target property with special attribute TypeConverterAttribute. Also, you can provide default value to your property by using another attribute DefaultValueAttribute. This will looks as following:

[TypeConverter(typeof(MyTextAlignmentTypeConverter))]
[DefaultValue(TextAlignment.Left)]
public TextAlignment TextAlignment
{
  get { return (TextAlignment)GetValue(TextAlignmentProperty); }
  set { SetValue(TextAlignmentProperty, value); }
}

How to build type converter

In order to build type converter, all you have to do is to build your own class, derived from TypeConverter. It also can be generic class. Then, implement necessary methods, that incorporate your business logic. Like this one, converter any enum value back and forward for TypeConverterAttribute

public class EnumValueConverter<T> : TypeConverter where T:struct
    {
        static EnumValueConverter()
        {
            if (!typeof(T).IsEnum) { Exceptions.ThrowInvalidOperationException("Cannot use this type for conversion"); }
        }

        public override bool CanConvertFrom(Type sourceType)
        {
            return Type.GetTypeCode(sourceType) == TypeCode.String;
        }

        public override object ConvertFrom(object value)
        {
            if (value == null)
            {
                typeof(T).ThrowConvertFromException(value);
            }
            if (value is string)
            {
                return ConvertFromString(value as string);
            }
            return (T)value;
        }

        public override object ConvertFromString(string text)
        {
            return (T)Enum.Parse(typeof(T), text, true);
        }

        public override string ConvertToString(object value)
        {
            return Enum.GetName(typeof(T), value);
        }
    }

Final result

Now, when we built converter and know how to use it, we can easily set it to any DependencyProperty requires conversion from / to enum

[TypeConverter(typeof(EnumValueConverter<LineStackingStrategy>))]
public LineStackingStrategy LineStackingStrategy
{
  get { return (LineStackingStrategy)GetValue(LineStackingStrategyProperty); }
  set { SetValue(LineStackingStrategyProperty, value); }
}

[TypeConverter(typeof(EnumValueConverter<TextAlignment>))]
[DefaultValue(TextAlignment.Right)]
public TextAlignment TextAlignment
  {
   get { return (TextAlignment)GetValue(TextAlignmentProperty); }
   set { SetValue(TextAlignmentProperty, value); }
  }

[TypeConverter(typeof(EnumValueConverter<TextWrapping>))]
public TextWrapping TextWrapping
{
  get { return (TextWrapping)GetValue(TextWrappingProperty); }
  set { SetValue(TextWrappingProperty, value); }
}

We done, have a nice day and be good people.

Stay tuned for release of BiDi support for Silverlight 2.0, sponsored by Development Platform Evangelism unit of Microsoft Israel

Silverlight Visual Tree Investigation

Wait a moment. Silverlight has Visual and Logical Trees as well as WPF? Not exactly. The design more similar to how it was in WinForms (Parent-Child relationship). But dev team made all possible to make it syntactically similar to WPF. Let’s start

Challenge: Find and hold references to all element, contains text.

Solution: Recursive VisualTreeHelper (introduced in SL2.0 b2)

First of all we should know, that Silverlight is not ready for manufacture, thus direct references might produce memory leaks, thus we’ll use WeakReference to hold pointers to SL objects.

First step: We know for sure, that TextBox and TextBlock controls has Text property, that holds only text. Also TextBlock can hold Inlines collection with Runs and LineBreaks. Let’s find them all

internal static List<WeakReference> GetTextElements(this DependencyObject root)
        {
List<WeakReference> res = new List<WeakReference>();
if (root is TextBlock | root is TextBox)
         {
                res.Add(new WeakReference(root));
         }

Next, we know, that ContentControl can hold text directly inside Content property. We’ll find them too, but should check if it holds text inside…

else if (root is ContentControl)
            {
                (root as ContentControl).CheckAndAddStringContentControl(ref res);
            }

Now ItemsControl. It can hold inside either ContentElement, TextBox, TextBlock or other. So we should check inside it too.

else if (root is ItemsControl)
            {
                ItemsControl ic = root as ItemsControl;
                for (int i = 0; i < ic.Items.Count; i++)
                {
                    if (ic.Items[i] is ContentControl)
                    {
                        (ic.Items[i] as ContentControl).CheckAndAddStringContentControl(ref res);
                    }
                    else
                    {
                        List<WeakReference> tmp = (ic.Items[i] as DependencyObject).GetTextElements();
                        if (tmp != null && tmp.Count > 0)
                        {
                            res.AddRange(tmp);
                        }
                    }
                }
            }

And last, but not least is to dig into all child of each control.

else
            {
                int cnt = VisualTreeHelper.GetChildrenCount(root);

                for (int i = 0; i < cnt; i++)
                {
                    DependencyObject d = VisualTreeHelper.GetChild(root, i);
                    List<WeakReference> tmp = d.GetTextElements();
                    if (tmp != null && tmp.Count > 0)
                    {
                        res.AddRange(tmp);
                    }

                }
            }
            return res;

Step two: Check whether object contains text inside. This one is simple. If not, we’ll call the main method to inter inside the control and check deeper.

internal static void CheckAndAddStringContentControl(this ContentControl cc, ref List<WeakReference> res)
        {
            if (cc.Content is string)
            {
                res.Add(new WeakReference(cc));
            }
            else
                res.AddRange(cc.GetTextElements());
        }

We done. Now we have WeakReferences collection of all items, which contains text in our page.

Have a good day and be nice one to another.

Tuesday, July 01, 2008

Quick Silverlight Tip: How to access HTML DOM from Silverlight and Silverlight managed objects from HTML?

After my session yesterday, I got number of email from people, who have a problem to access HTML DOM from Silverlight and vice verse. I want to answer to all of you by this post.

Access HTML from Silverlight

You have not do anything special in Silverlight to access it.  Your friend is HtmlPage.Window object. For example, if I want to execute window.open JavaScript method from Silverlight, all I have to do is to call:

public void OpenWindow()

        {

HtmlPage.Window.Invoke("open", new object[] { "http://blogs.microsoft.co.il/blogs/tamir", "login", "resizable=1,width=646,height=436" });

        }

HtmlPage.Window.Invoke also returns Object – this is the response of function executed.

Access Silverlight Managed Objects from HTML

Here you should remember two things:

  • You should mark both class and member you want to access with special attributes ScriptableType (for class) and ScriptableMember (for member)
  • Register Scriptable object anywhere (for example in Constructor).

So, if you want OpenWindow method to be exposed from the Page class to HTML, you should use following code:

    [ScriptableType]
public partial class Page : UserControl    {
public Page() {
            InitializeComponent();
            HtmlPage.RegisterScriptableObject("Page", this);
        }

[ScriptableMember]
public void OpenWindow() {
object o = HtmlPage.Window.Invoke("open", new object[] { "http://blogs.microsoft.co.il/blogs/tamir", "login", "resizable=1,width=646,height=436" });
        }
}

That’s all, folks. Be good people and have a nice day.

Here the script of test application:

Page.xaml

<UserControl x:Class="DomAccessDemo.Page"

xmlns="http://schemas.microsoft.com/winfx/2006/xaml/presentation"

xmlns:x="http://schemas.microsoft.com/winfx/2006/xaml"

Height="20">

<Grid x:Name="LayoutRoot" Background="White">

<Button Click="Button_Click" Content="Fun!"/>

</Grid>

</UserControl>

Page.xaml.cs

using System.Windows;

using System.Windows.Controls;

using System.Windows.Documents;

using System.Windows.Input;

using System.Windows.Media;

using System.Windows.Media.Animation;

using System.Windows.Shapes;

using System.Windows.Browser;

using System.ComponentModel;

namespace DomAccessDemo

{

    [ScriptableType]

public partial class Page : UserControl

    {

public Page()

        {

            InitializeComponent();

HtmlPage.RegisterScriptableObject("Page", this);

        }

private void Button_Click(object sender, RoutedEventArgs e)

        {

            OpenWindow();

        }

        [ScriptableMember]

public void OpenWindow()

        {

object o = HtmlPage.Window.Invoke("open", new object[] { "http://blogs.microsoft.co.il/blogs/tamir", "login", "resizable=1,width=646,height=436" });

        }

    }

}

DomAccessDemoTestPage.aspx

<html xmlns="http://www.w3.org/1999/xhtml" style="height:100%;">

<head runat="server">

<title>Test Page For DomAccessDemo</title>

<script language="javascript">

function testSL()

        {

var xaml = document.getElementById("Xaml1");

            xaml.Content.Page.OpenWindow();

        }

</script>

</head>

<body style="height:100%;margin:0;">

<form id="form1" runat="server" style="height:100%;">

<asp:ScriptManager ID="ScriptManager1" runat="server"></asp:ScriptManager>

<div style="height:100%;">

<asp:Silverlight ID="Xaml1" runat="server" Source="~/ClientBin/DomAccessDemo.xap" MinimumVersion="2.0.30523" Width="100%" Height="100%" />

</div>

</form>

<button onmouseup="testSL();">Test</button>

</body>

</html>

Tuesday, June 17, 2008

HLSL (Pixel shader) effects tutorial

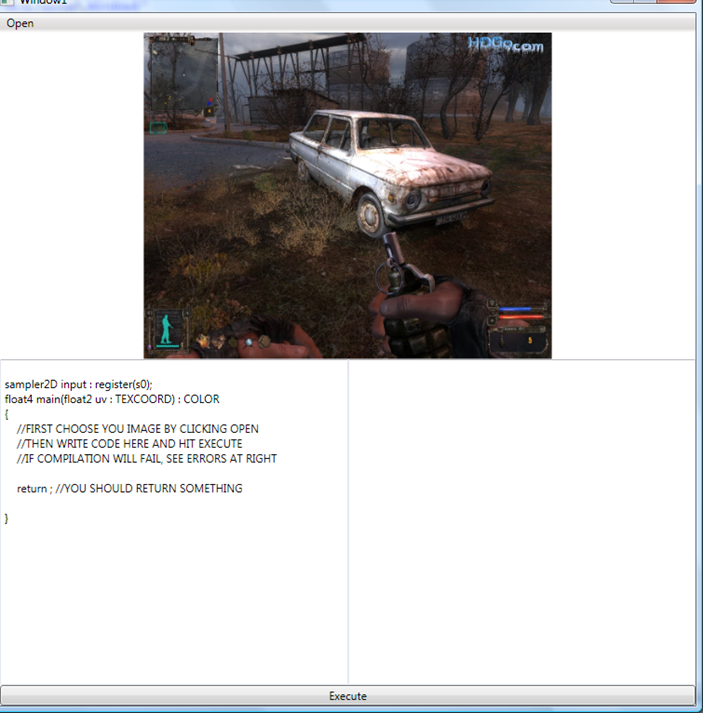
Recently, I already wrote about PixelShader effects, introduced in .NET framework 3.5 SP1 (WPF). However it looks like for most people this syntax is still hard to understand. Today we’ll try to lean it more. In order to do this, I wrote small program, that helps you to write and debug pixel shader effects quickly. This how it looks like

image

Hit Open to load image, Write your code and hit Execute to compile and apply bitmap dx effect to the image. Let’s start from very beginning. Effect, that does nothing:

sampler2D input : register(s0);
float4 main(float2 uv : TEXCOORD) : COLOR
{
    float4 Color;
    Color = tex2D( input , uv.xy);
    return Color;
}

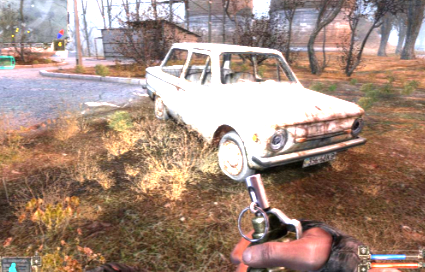
This is the results:

image

What was done? We got pixel. Read it color and return it as it to the shader. Let’s do something more interesting.

Actually we can get float2 as coordinate, this means, that it can be spitted to uv.x and uv.y. Also color is float4 (argb), thus we can change color. Let’s multiply color by 3

Color = tex2D( input , uv.xy)*3;

And the result is bright image

image

We also can make operations with variables.

Color = tex2D( input , uv.xy)*uv.x;

Result

image

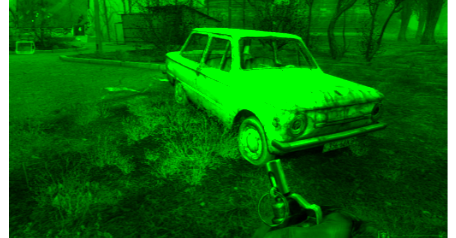
We not have to change whole color. We can also change only its part. Blue for example

Color = tex2D( input , uv.xy);
Color.b = Color.b*2;

Result

image

Or execute math operations

Color = tex2D( input , uv.xy);
Color.r = Color.r*sin(uv.x*100)*2;
Color.g = Color.g*cos(uv.x*150)*2;
Color.b = Color.b*sin(uv.x*50)*2;

Result

image

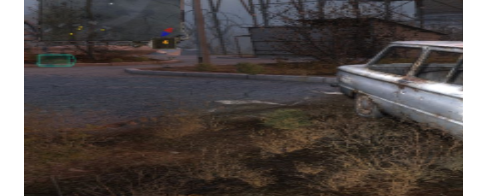
Color is not only thing we can operate. Actually we’re sampling coordinates, so operations done with coordinates should work. Let’s try to stretch image

uv.x = uv.x * 0.5;
Color = tex2D( input , uv.xy);

Result

image

Why 0.5? Should not it make it smaller? Actually not, you’re multiplying coordinates, so to make the image smaller, you should divide

uv.x = uv.x / 0.5;
Color = tex2D( input , uv.xy);

Result

image

Some math could be fun here also

uv.y = uv.y  + (sin(uv.y*100)*0.03);
Color = tex2D( input , uv.xy);

Result

image

There are a ton of interesting effects you can do by using pixel shaders. Here for example color shift

   Color = tex2D( input , uv);
Color.r -= tex2D( input , uv +(somevar/100)).r;
Color.g += tex2D( input , uv+ (somevar/200)).g;
Color.b -= tex2D( input , uv+ (somevar/300)).b;

Result:

image

Or, even cooler efects

Color -= tex2D(input , uv.xy-0.003)*2.7f;
Color += tex2D( input , uv.xy+0.003)*2.7f;
Color.rgb = (Color.r+Color.g+Color.b)/3.0f;

Result

image

You can also use cases and ifs for even cooler effects

Color.rgb = (Color.r+Color.g+Color.b)/3.0f;
if (Color.r<0.2 || Color.r>0.9) Color.r = 0; else Color.r = 1.0f;
if (Color.g<0.2 || Color.g>0.9) Color.g = 0; else Color.g = 1.0f;
if (Color.b<0.2 || Color.b>0.9) Color.b = 0; else Color.b = 1.0f;

Result

image

Other words, the sky is the limit.

Please note, that Pixel Shaders done in GPU only, thus it is the most efficient method to manipulate your images. Actually, you can apply effect to any UIElement, thus the sky is really the limit.

Have a nice day and be good people. Download code for this article. Notice, that you’ll need DirectX SDK to compile pixel shader files and use this program

Friday, May 23, 2008

Brightness and contrast manipulation in WPF 3.5 SP1

While being in flight, I had to learn new features, introduced in .NET 3.5 SP1. So, let’s start from image manipulation. I want to perform contrast and brightness manipulation in GPU over displayed image. In order to begin, you should download and install .NET 3.5 SP1 and Visual Studio 2008 SP1. Meanwhile (it’s about 500 MB of download) we’ll learn how to write custom shader effect.

image

In order to build custom Shader Effer, we have to use HLSL (High Level Shading Language). This is programming language, introduces in DirectX 9.0 and supports the shader construction with C-like syntax, types, expressions and functions. If you know C – it will be very easy for you to learn it.

What is shader? Shader is consists of vertex shader and pixel shader. Any 3D model flows from application to the vertex shader, then pixel shader frames buffer. So we’ll try from simple matrix transformation. First we should build the struct of the position. It is float4 type and has POSITION inheritance. Also we have to get matrix, which is regular float4x4 object. Then all we have to to is to translate inpos by matrix and return new position. That’s exactly what following code does.

float4 main(float4 inpos : POSITION, uniform float4x4 ModelViewMatrix) : POSITION
  {
     return mul(inpos, ModelViewMatrix);
  }

So by using HLSL we can play freely with vertexes, but what’s happen with pixel shader? This works exactly the same way. We have pixel, which is TEXCOORD in input and COLOR in output. So, here it comes

float4 main(float2 uv : TEXCOORD, float brightness, float contrast) : COLOR
{
    float4 color = tex2D(input, uv); 
    return (color + brightness) * (1.0+contrast)/1.0;
}

For more information about HLSL, please visit MSDN. As for us, we already have our shader effect and how we have to compile it into executable filter. In order to do it, we’ll use directx shader effect compiler. Let’s say, that we have our source in effect.txt file and our output file will be effect.ps. Small tip insert following line into pre-build event, and have your shader effect script ready and up-to-day with each compilation.

fxc /T ps_2_0 /E main /Fo"$(ProjectDir)effect.ps" "$(ProjectDir)effect.txt"

Mode information about FX compiler command switches, can be found here. How we should actually wrap our effect in manage code. But wait. We have to pass parameters into shader effect. How to register external parameters within FX file? Simple. Exactly as input params. Note, the tag inside register method will actually be used within our managed wrapper.

sampler2D input : register(s0);
float brightness : register(c0);
float contrast : register(c1);

float4 main(float2 uv : TEXCOORD) : COLOR
{
    float4 color = tex2D(input, uv);
    float4 result = color;
    result = color + brightness;
    result = result * (1.0+contrast)/1.0;
    return result;
}

Well done.  Let’s build wrapper. Of cause you should inherit from ShaderEffect object and register your input param

public class BrightContrastEffect : ShaderEffect
    {

public Brush Input
        {
            get { return (Brush)GetValue(InputProperty); }
            set { SetValue(InputProperty, value); }
        }

        public static readonly DependencyProperty InputProperty = ShaderEffect.RegisterPixelShaderSamplerProperty("Input", typeof(BrightContrastEffect), 0);

Then load pixel shader from application resources (you should compile ps file as “Resource”)

private static PixelShader m_shader = new PixelShader() { UriSource = new Uri(@"pack://application:,,,/CustomPixelRender;component/bricon.ps") };

Then parameters (they are regular dependency objects) with additional special PixelShaderConstantCallback, that received the numeric id of registered properties from pixel shader effect.

public float Brightness
        {
            get { return (float)GetValue(BrightnessProperty); }
            set { SetValue(BrightnessProperty, value); }
        }

        public static readonly DependencyProperty BrightnessProperty = DependencyProperty.Register("Brightness", typeof(double), typeof(BrightContrastEffect), new UIPropertyMetadata(0.0, PixelShaderConstantCallback(0)));

        public float Contrast
        {
            get { return (float)GetValue(ContrastProperty); }
            set { SetValue(ContrastProperty, value); }
        }

A couple of updates and we done with code behind.

public BrightContrastEffect()
        {
            PixelShader = m_shader;
            UpdateShaderValue(InputProperty);
            UpdateShaderValue(BrightnessProperty);
            UpdateShaderValue(ContrastProperty);

        }

Next step is XAML. Each UI element in .NET 3.5 SP1 got new property, named Effect, that designed to hold your custom shader effects (exactly as it was with transformations in 3.0 and 3.5). I want to perform a transformation over image.

<Image Source="img.jpg">
           <Image.Effect>
               <l:BrightContrastEffect

Now we should build two sliders to manage brightness and contrast level

<UniformGrid Grid.Row="1">
           <TextBlock Text="Brightness"/>
           <Slider Maximum="1" Minimum="-1" Name="bVal"/>
           <TextBlock Text="Contrast"/>
           <Slider Maximum="1" Minimum="-1" Name="cVal"/>
       </UniformGrid>

And bind to its values from our pixel shader effect

<Image Source="img.jpg">
            <Image.Effect>
                <l:BrightContrastEffect
                    Brightness="{Binding ElementName=bVal, Path=Value}"
                    Contrast="{Binding ElementName=cVal, Path=Value}"/>
            </Image.Effect>
        </Image>

That’s all, folks. Please note, that everything, done with shader effects, done in GPU. Also, the effect applies on rendered object (you can set the same effect not only to image, but to any UIElement in your system. Thus from performance point of view it’s the best method to work with your output. Let’s take for example very big image (3000x3000 pixels), rendered with low quality to 300x300 size. Perform per-pixel transformation (what we done here) will take 300X300Xdpi loops. While if you’ll perform the same operating over source image or memory section, used to create it, you’ll have to do 3000x3000xdpi loops, which is x10^2 more times.

Have a nice day and be good people.

Source code for this article.